Living in a small apartment has taught me more about creativity than any design course ever could. When you’re working with 600 square feet and a tight budget, you learn to look at every corner, every wall, and every piece of furniture as an opportunity rather than a limitation. Over the past few years, I’ve transformed three different small apartments from bland rental boxes into spaces that actually feel like home without breaking the bank or losing my security deposit.
The thing about 2026 is that we’re finally seeing a shift in how people approach small-space living. It’s not just students and young professionals anymore. Remote workers, downsizers, and minimalists are all choosing compact apartments, which means the demand for smart, affordable decor solutions has never been higher. And honestly? The DIY options available now make it easier than ever to create a personalized space without spending thousands at overpriced furniture stores.
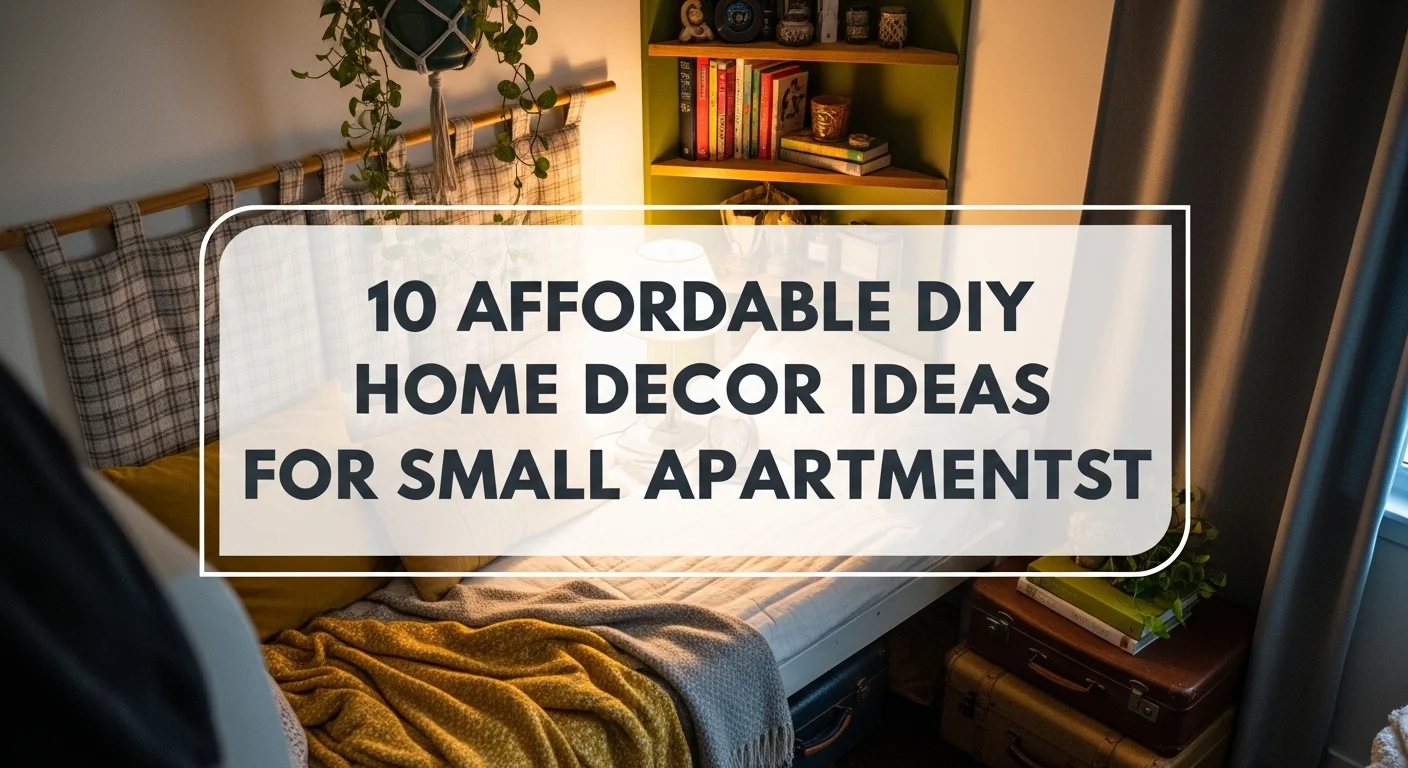
Let me walk you through ten DIY projects that have genuinely worked for me and others I know. These aren’t Pinterest-perfect ideas that look good in photos but fall apart in real life. These are practical, budget-friendly solutions that address the actual challenges of small apartment living.
1. Floating Corner Shelves Using Reclaimed Wood
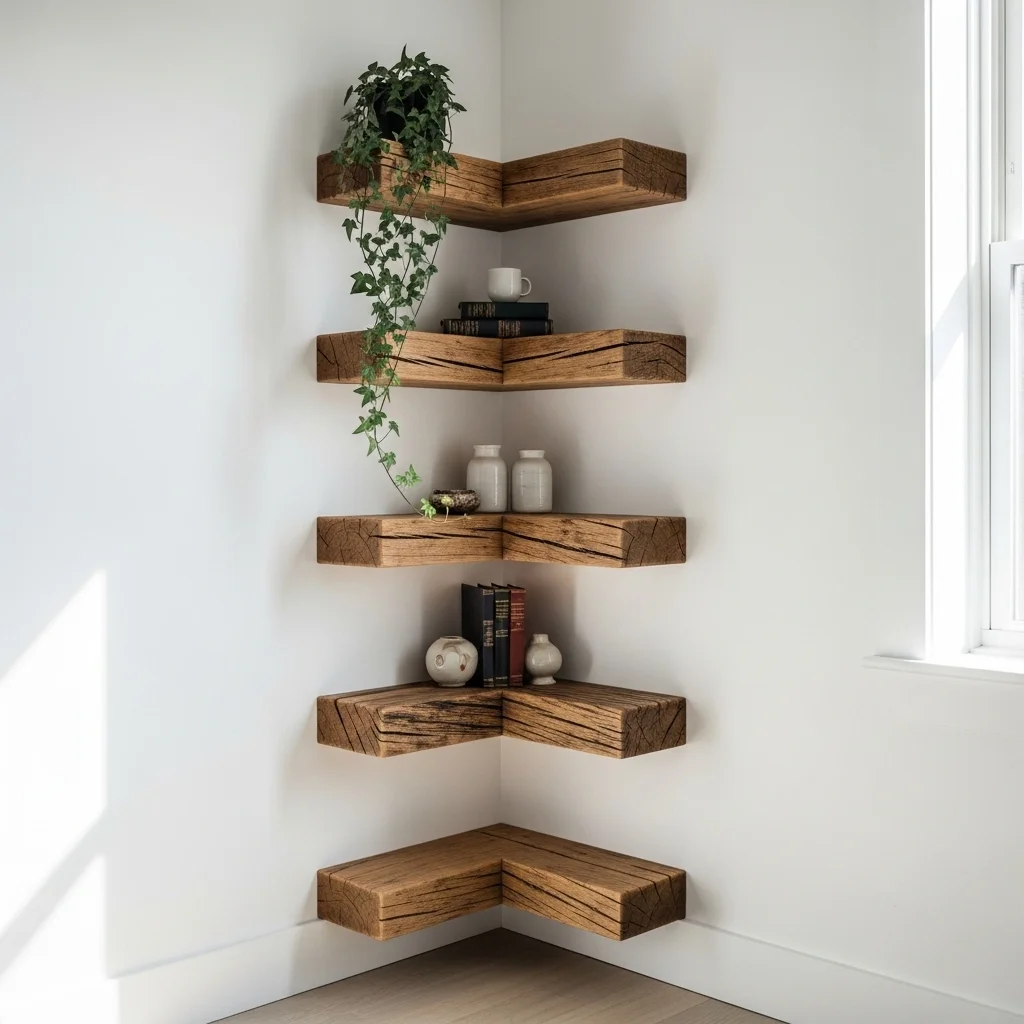
Corner spaces in small apartments are criminally underused. I learned this the hard way after living in my first studio for six months before realizing I had eight corners doing absolutely nothing.
Building floating corner shelves from reclaimed wood costs maybe $30-50 total if you know where to look. I’ve sourced beautiful barn wood from local salvage yards, old pallets from behind grocery stores (always ask permission first), and even weathered fence boards from neighbors doing renovations. The character in aged wood beats anything you’d buy new, and the environmental angle feels good, too.
The construction is straightforward; you’re essentially creating triangular shelves that fit snugly into corners. I use simple L-brackets hidden underneath for support. Sand the wood down (this step is non-negotiable unless you want splinters), apply a food-safe finish if you’re storing kitchen items, and mount them at varying heights.
In my current apartment, I have five corner shelves displaying plants, books, and small decorative objects. They’ve added probably 15 square feet of usable storage and display space without making the room feel cluttered. The vertical eye movement actually makes the ceiling feel higher, which is a nice bonus in a place with standard 8-foot ceilings.
2. Peel-and-Stick Wallpaper Accent Walls (Done Right)
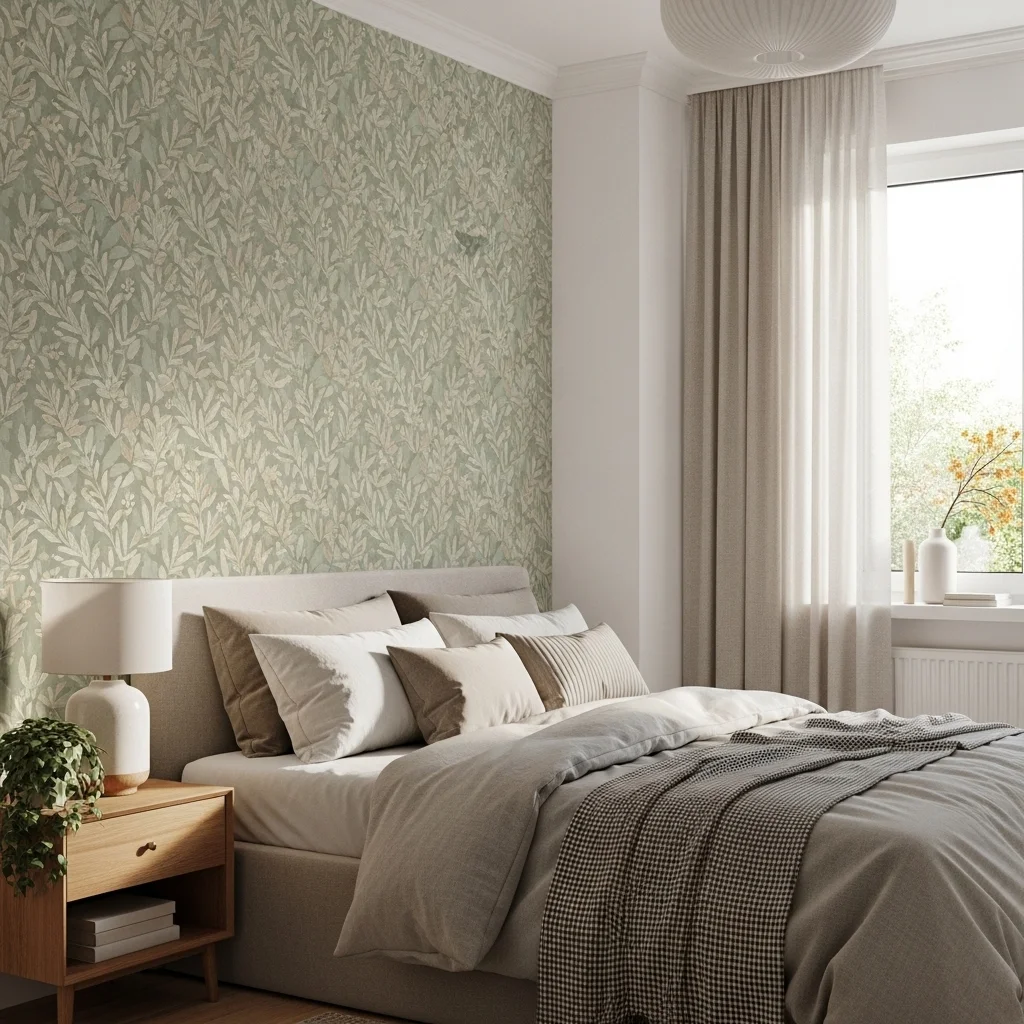
I was skeptical about peel-and-stick wallpaper for years. The early versions from 2019-2021 were pretty terrible; they peeled at the edges, left residue, and looked cheap up close. But the technology has improved dramatically.
Here’s what I’ve learned from doing three accent walls across different apartments: the quality of the wallpaper matters enormously. Spend the extra $20-30 on thicker, textile-backed options rather than the ultra-cheap vinyl ones. Companies like Spoonflower and several Etsy sellers are producing genuinely good removable wallpaper now that holds up to humidity and doesn’t photograph with that telltale glossy sheen.
The trick is to choose one wall, usually the one behind your bed or sofa, and keep it simple. I made the mistake of choosing a busy geometric pattern for my entire bedroom in 2024, and it was overwhelming. Now I stick with subtle textures, soft botanical prints, or muted colors that add interest without dominating the space.
For a small one-bedroom apartment, budget about $150-200 for enough wallpaper to cover a standard accent wall. It’s not pocket change, but compared to paint (which many landlords don’t allow) or wall art that costs similar amounts, it’s a reasonable investment. Plus, you can take it with you when you move.
Read also: Top 10 Recycled Home Decor Ideas for Eco-Friendly Homes
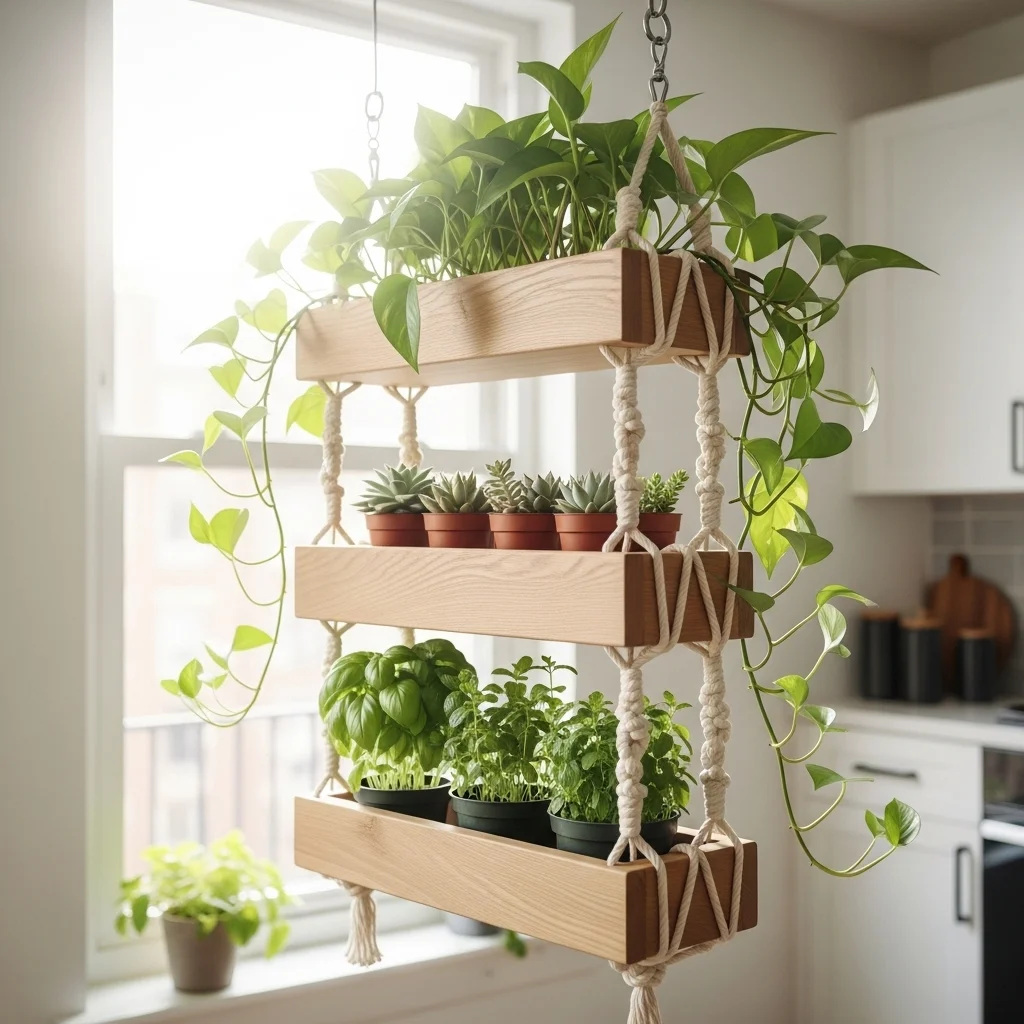
3. Rope and Wood Hanging Planters
Plants make small spaces feel alive, but floor and surface space is precious. I’ve been using hanging planters for three years now, and they’ve completely changed how I think about greenery in tight quarters.
The DIY version I keep coming back to involves wooden boards or thick branches, rope, and basic knots. You drill holes in the corners of the wood pieces, thread sturdy rope through (I use 6mm cotton rope), and tie it off to create a suspended shelf. Stack two or three tiers if your ceiling height allows it.
Cost breakdown: About $25-40 for rope, wood, ceiling hooks, and toggle bolts. I get my wood cut to size at the hardware store. Most places still do this for free, which saves the hassle of sawing it yourself in an apartment.
Position these near windows for light-loving plants, or choose pothos and snake plants if you’re working with limited natural light. I currently have a three-tier setup in my kitchen window with herbs on the bottom (easier to reach for cooking), a small succulent collection in the middle, and trailing pothos on top.
One warning: make sure you’re anchoring into ceiling joists or using proper toggle bolts rated for the weight. I learned this lesson when a poorly anchored planter came down at 2 AM, covering my kitchen floor in potting soil. Not fun.
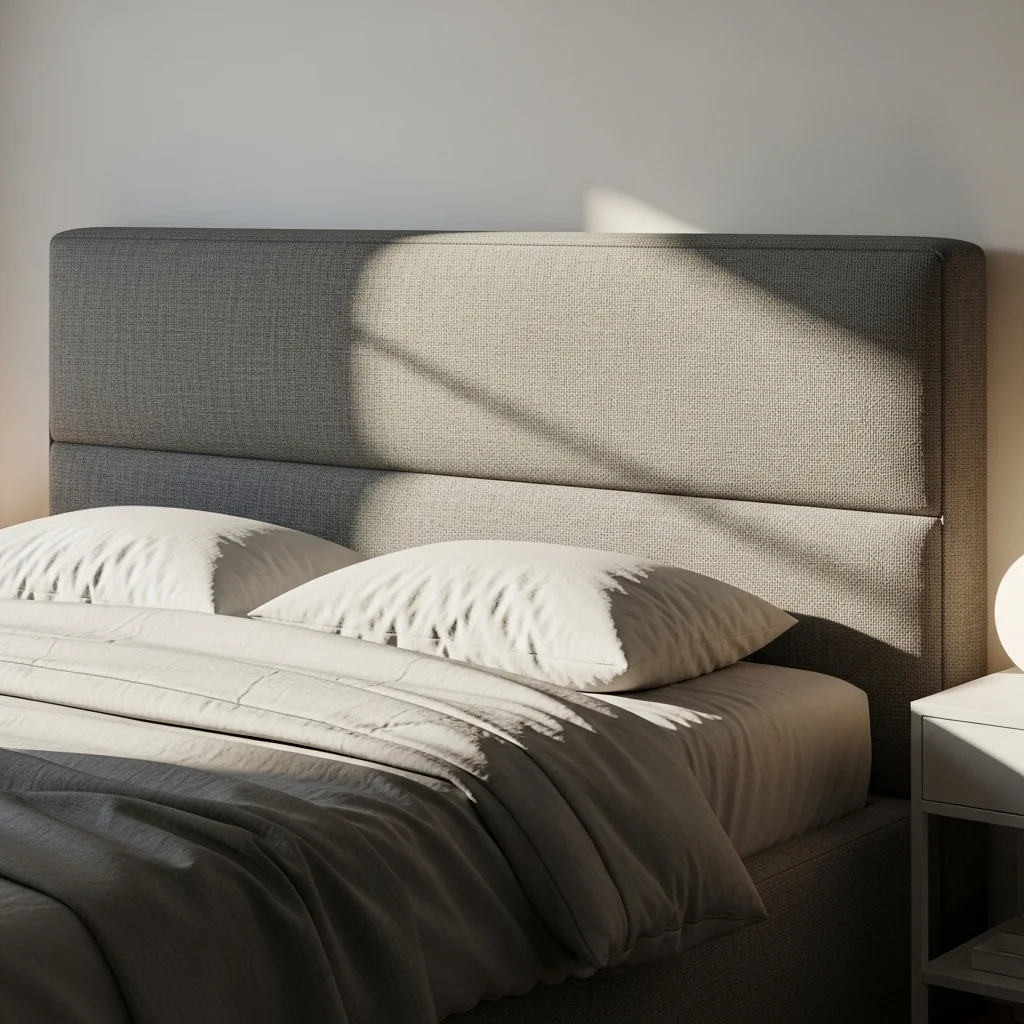
4. Custom Headboard from Fabric and Foam
Headboards are expensive and bulky, two things that don’t work well in small apartments. But beds look unfinished without them, especially when your bedroom is visible from your living area.
I made my first DIY headboard in 2023 for under $70, and it’s still holding up perfectly. The basic concept: cut a piece of plywood or foam board to size (I went with foam board because it’s lighter), wrap it with batting for softness, then cover it with fabric. Staple gun, done.
The beauty of this approach is customization. I chose a textured linen fabric in a soft gray that complements my bedding but doesn’t match it exactly, matching looks too coordinated, in my opinion. Friends have used everything from vintage quilts to velvet to outdoor-grade fabric with geometric patterns.
For mounting, I used French cleats (two interlocking pieces of wood at an angle) that distribute the weight and don’t damage walls. Some people lean their headboards against the wall, which works if you’re not worried about it shifting, but I prefer the security of a proper mount.
Size matters here. In a small bedroom, extending your headboard a few inches beyond the width of your bed creates a visual anchor without overwhelming the space. I went 6 inches wider on each side for my full-size bed, which feels proportional.
5. Magnetic Knife Strip Gallery Wall
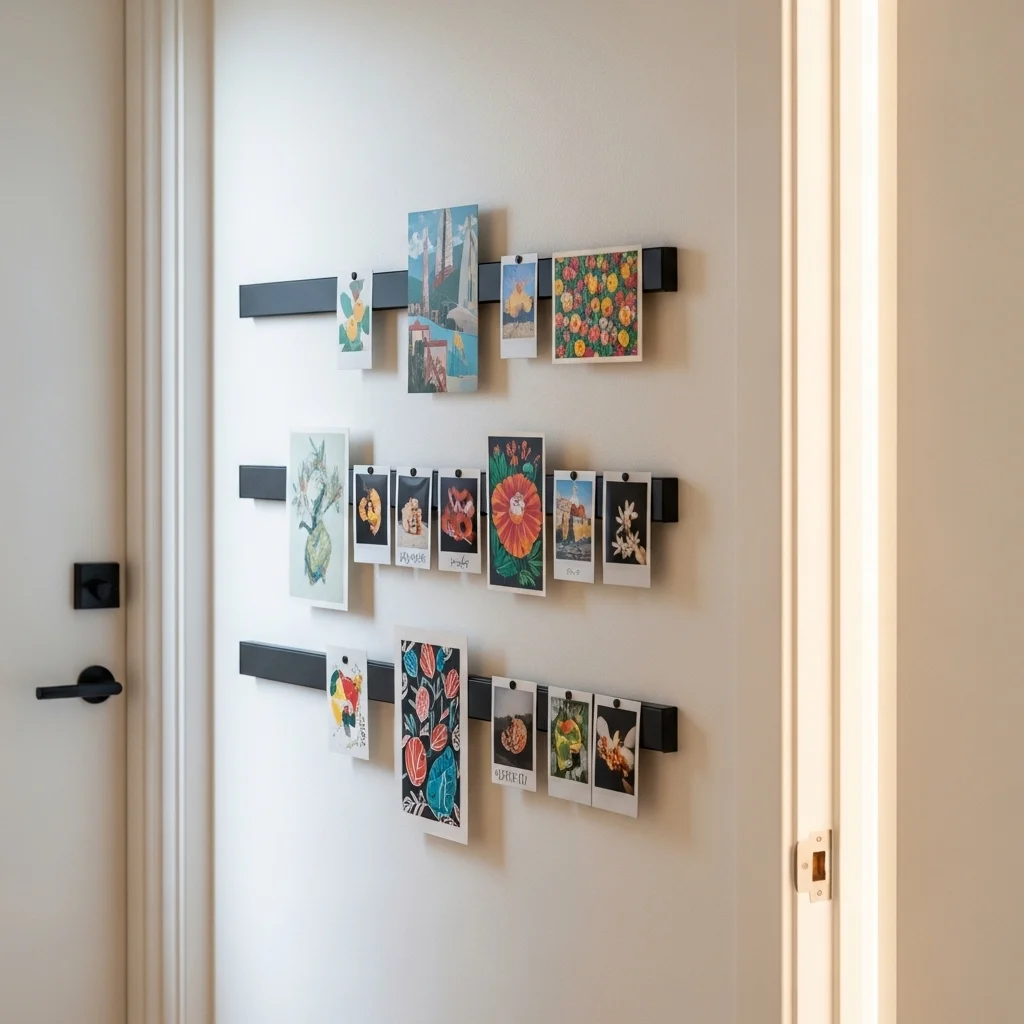
This one sounds weird until you see it in action. Magnetic knife strips, those long, magnetized bars typically used in kitchens, work brilliantly as picture ledges for small artwork, postcards, and photos.
I have three 16-inch strips mounted horizontally on my entryway wall, creating a gallery that I can constantly update. The strips cost about $12-15 each, and I attached small metal squares (just copper craft tape from the hardware store) to the backs of my artwork. Photos slip into magnetic photo corners I bought in bulk online.
The flexibility is what makes this worthwhile. Traditional frames take up space, and you’re committed to what’s inside. With this system, I rotate new postcards from trips, swap seasonal prints, and rearrange things whenever I’m bored. It takes thirty seconds to completely change the look.
This works especially well in small apartments because you can create visual interest without the permanence and expense of traditional gallery walls. No nail holes, no measuring, no commitment.
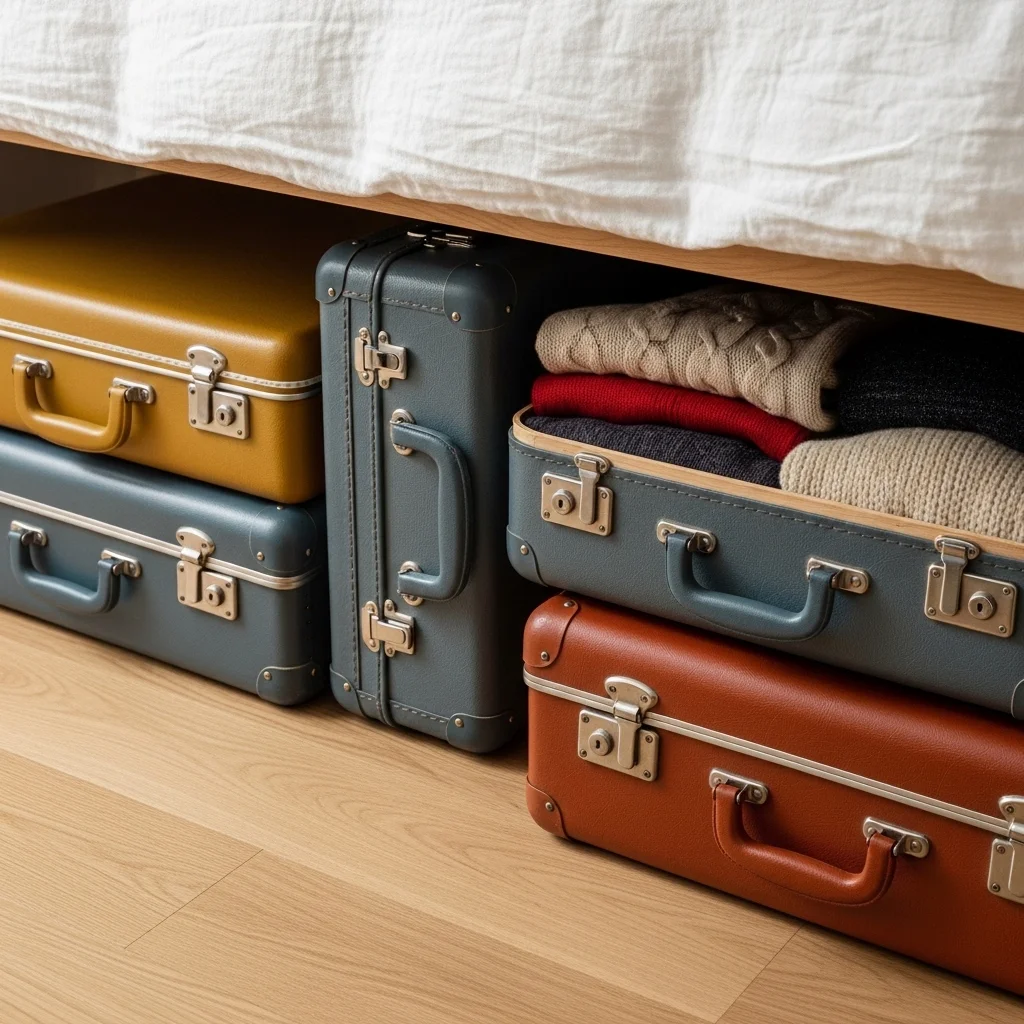
6. Under-Bed Storage Boxes with Vintage Suitcases
Storage is the eternal challenge of small apartment living. I’ve tried every solution out there, and the best combination I’ve found is functional storage that doubles as decor.
Vintage suitcases from thrift stores, estate sales, and online marketplaces work perfectly for under-bed storage. They slide in and out easily, they look intentional if part of them shows, and they’re often cheaper than purpose-built storage containers. I paid $8-20 for each of the four suitcases currently under my bed.
Here’s the practical part: measure your under-bed clearance before you start hunting. My bed frame gives me 8 inches, which is pretty standard. Look for hard-shell suitcases from the 70s and 80s; they’re sturdy, the right size, and usually have that great vintage patina.
I use mine for seasonal clothing, extra linens, and those random items you need occasionally but not frequently (gift wrapping supplies, holiday decorations, beach towels). Label them with small tags if you’re the organized type. I just remember which is which by color.
For beds without clearance, you can stack vintage suitcases at the foot of the bed as a bench alternative. Add a cushion on top if you want seating. Same storage benefit, different configuration.
Read also: How to Make Handmade Home Decor Items: A Practical Guide from My Craft Room
7. Painted Terra Cotta Pots as Multi-Purpose Storage
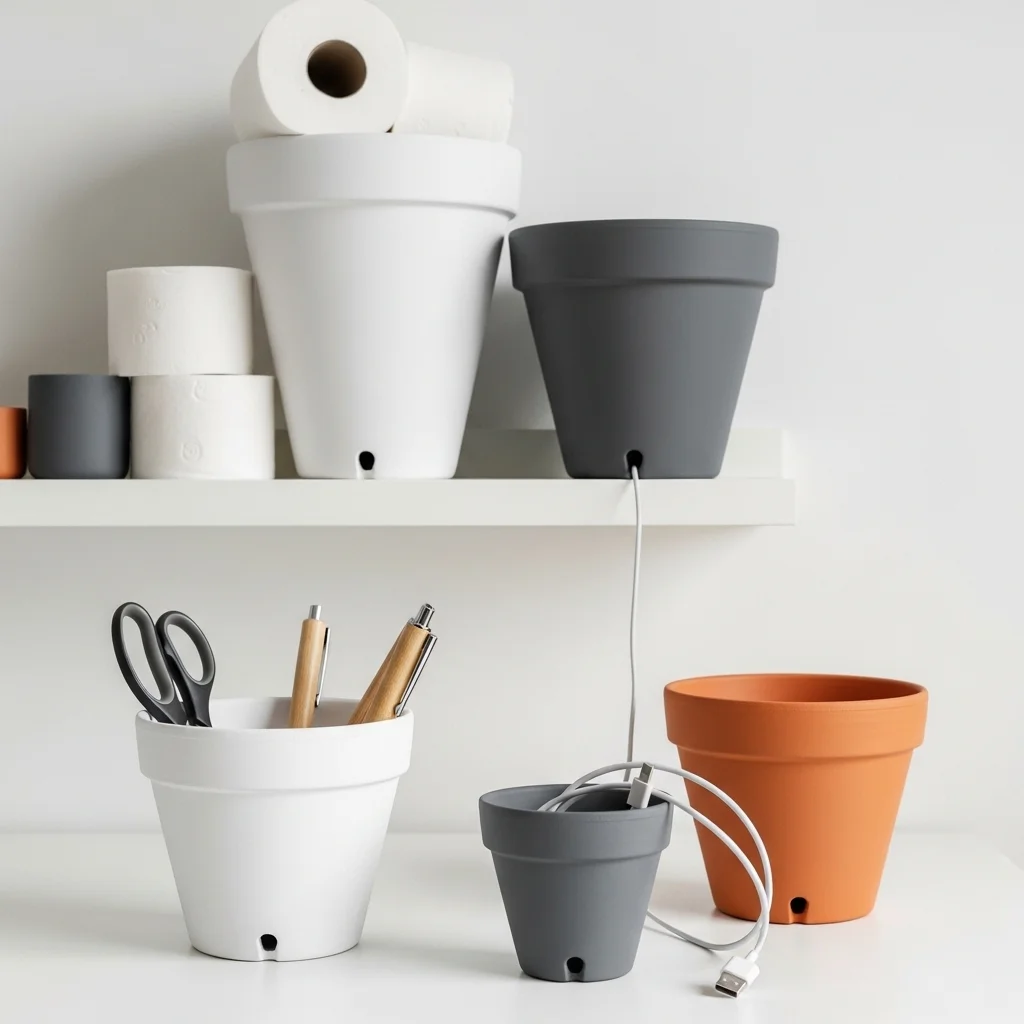
Terra cotta pots are dirt cheap (pun intended) and incredibly versatile beyond plants. I picked up six different sizes for under $20 total and transformed them into bathroom storage, office organization, and kitchen utensil holders.
The DIY part is simple painting. Clean the pots thoroughly, apply a primer if you want the paint to last longer, then use whatever paint you have on hand. I’ve used leftover house paint, craft acrylics, and even spray paint. Chalk paint gives a nice matte finish that feels more expensive than it is.
In my bathroom, a large painted pot holds toilet paper rolls and looks a thousand times better than those weird toilet paper storage towers. Medium pots on my desk organize pens, scissors, and charging cables. Small ones in the kitchen corral wooden spoons and whisks.
The trick to making this look intentional rather than crafty is staying within a cohesive color palette. I went with whites, soft grays, and one terracotta pot left in its natural state. Too many colors, and it starts looking like a kindergarten classroom.
Drainage holes aren’t a problem for non-plant use, actually; they’re useful for cable management. Thread charging cables through the bottom hole so they stay put but are easy to access.
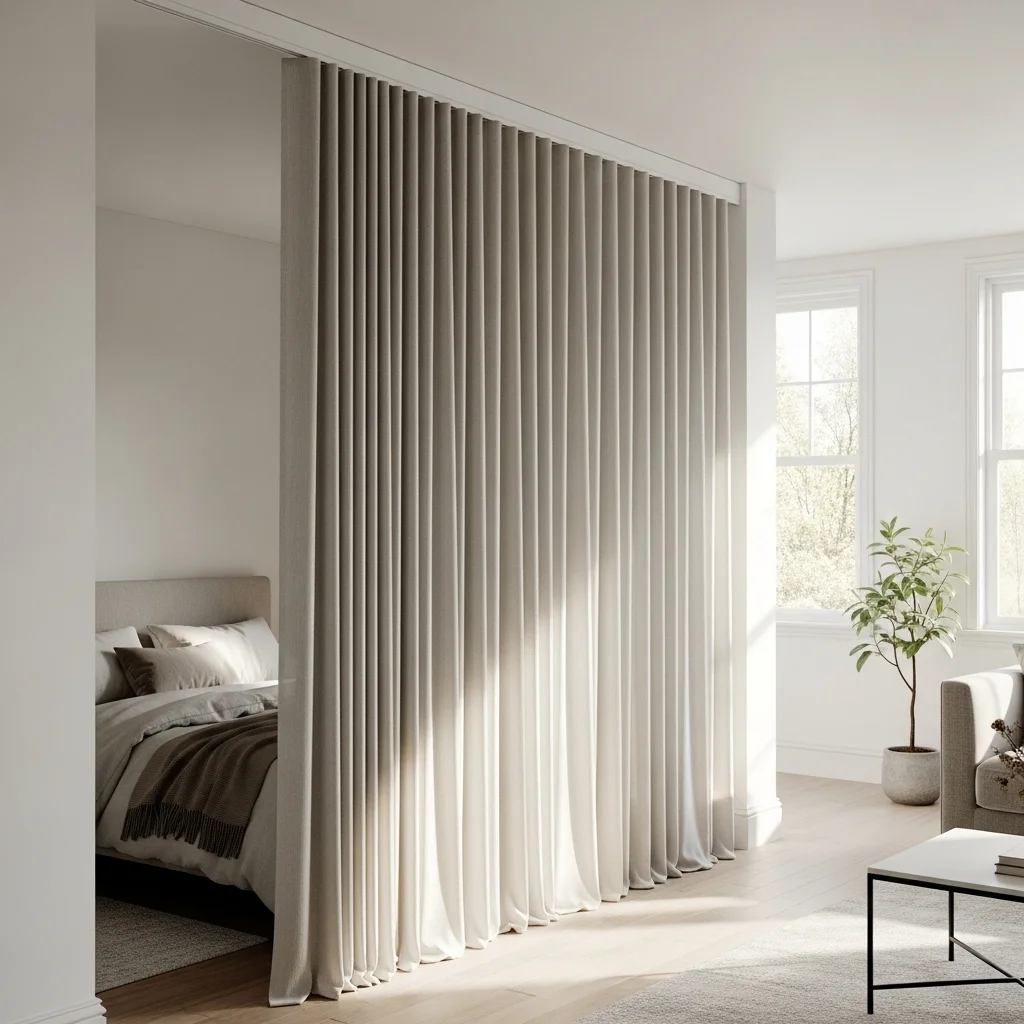
8. Curtain Room Dividers with Ceiling-Mounted Tracks
Studio apartments and open-plan living spaces need division without walls. I’ve lived in two studios now, and curtain dividers were game-changers in both.
The ceiling-mounted track system is crucial because those tension rods and floor-to-ceiling poles always look temporary. Spending $50-80 on a proper track that screws into the ceiling (again, find those joists) makes the whole setup feel architectural rather than makeshift.
I use a curtain divider to separate my sleeping area from my living space. During the day, the curtain pulls back completely. At night or when I have guests, I close it and suddenly have a private bedroom. The psychological impact of this division is bigger than you’d expect. My sleep improved noticeably once my bed wasn’t visible from my living area.
For fabric, I chose a medium-weight linen in a neutral color that complements both sides of the divide. Sheer curtains work if you want light to filter through, but they don’t provide much privacy. Heavier fabrics add some sound dampening, which helps if you’re trying to sleep while a roommate is still up.
Installation took about two hours, including the time spent finding studs and making sure everything was level. I borrowed a drill from a neighbor. If you don’t have access to tools, many hardware stores rent them by the hour for cheap.
9. Modular Pegboard System for Vertical Organization
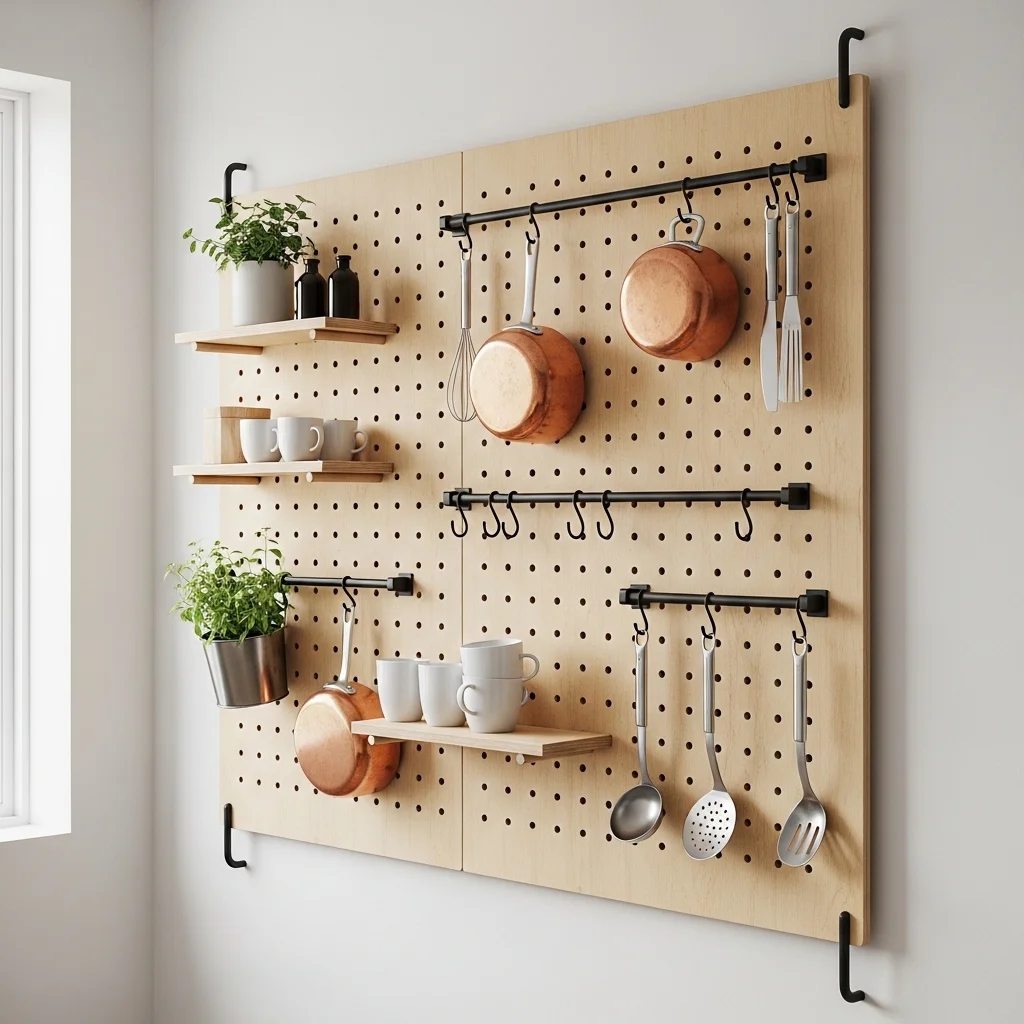
Pegboard has come a long way from the garage-only aesthetic. A modern pegboard in the right finish (I prefer painted white or natural wood) works beautifully for kitchen organization, office supplies, or even jewelry storage.
I installed a large pegboard panel (4 feet by 4 feet) in my kitchen for about $40 in materials. It holds pots, pans, utensils, cutting boards, and my coffee mugs. Everything is visible and accessible, which matters in a kitchen where cabinet space is limited.
The modular aspect is key; you can rearrange hooks and pegs as your needs change. I started with my pegboard set up for cooking tools, then shifted things around when I got more into baking and needed different equipment accessible.
For mounting, I created a 1-inch gap between the wall and the pegboard using small blocks of wood. This allows the pegs to actually insert into the holes. It’s a detail that’s easy to miss if you’ve never worked with pegboard before, and I’ve seen people mount them flat against the wall and then wonder why nothing fits.
Beyond the kitchen, I’ve seen friends use pegboards brilliantly in entryways (for keys, bags, and dog leashes), home offices (for supplies and cable management), and bedrooms (for accessories and jewelry). The vertical storage is invaluable in small spaces.
Read also: Top 10 Wall Decor DIY Ideas at Home: Projects I’ve Actually Completed
10. Upcycled Crate Furniture

Wooden crates have become trendy to the point of cliché, but there’s a reason: they work. I’ve built nightstands, bookshelves, a TV stand, and a coffee table from various crates over the years.
The best sources are local farms, craft stores (watch for sales), and wine shops. I’ve gotten free apple crates from orchards and paid $8-12 for wine crates. The wine crates are sturdier and have better proportions for furniture, in my experience.
For a basic nightstand, flip a crate on its side, add a piece of wood across the top for stability if needed, and you’re done. I screwed two crates together vertically for a narrow bookshelf that fits perfectly in the awkward space beside my bed. Four crates bolted together in a square configuration make a coffee table with built-in storage.
Finishing is where you can get creative. I’ve left some natural, stained others in dark walnut, and painted a few in colors that match my decor. Lightly sand any rough edges. Crates are meant for produce and bottles, not for sitting next to your bed, so splinters are common.
For stability, especially with stacked configurations, use metal L-brackets at the joints. Nothing fancy, just basic corner braces from the hardware store. I learned this when my initial bookshelf crate setup twisted and nearly toppled. A few brackets fixed the issue permanently.
The Reality of DIY Decor
Let me be honest about something: not every DIY project works perfectly on the first try. I’ve wasted money on materials for ideas that looked great in my head but terrible in execution. I’ve spent entire weekends on projects that ended up in the dumpster.
But the successes of these ten ideas among them have saved me thousands of dollars over the years while creating a home that actually reflects who I am. There’s something satisfying about guests complimenting a headboard or shelving unit and being able to say, “I made that” instead of “I bought it at IKEA.”
The total cost for materials if you did all ten projects would run somewhere around $500-700, depending on what you already have on hand and how good you are at finding deals. That’s less than a single piece of furniture from many contemporary furniture stores, and you’d end up with personalized decor throughout your entire apartment.
Small apartments in 2026 cost more than ever in most cities. The least we can do is make them feel like home without emptying our bank accounts in the process. These DIY projects have worked for me across different apartments, different cities, and different stages of life. The specific execution might vary your color choices, your arrangement, and your particular space constraints, but the underlying ideas are sound.
Start with one project. See how it goes. Build from there. And remember that “good enough” is actually good enough when it comes to creating a space where you feel comfortable and happy. Perfect is expensive and often boring. DIY is about making something that works for your life, not for a magazine spread.
Your small apartment can be beautiful, functional, and uniquely yours. You just need some creativity, basic tools, and the willingness to try.