My first apartment kitchen was 47 square feet. That’s not a typo. I measured it three times because I couldn’t believe a kitchen could actually be that small and still technically qualify as a kitchen. It had approximately 18 inches of usable counter space, four drawers, and cabinets so shallow that dinner plates had to go in sideways.
I lived there for two years, and I’m not exaggerating when I say that kitchen made me a better cook than any expensive culinary class ever could have. When you have no space for mistakes, no room for clutter, and no option to just “buy more storage,” you learn real fast what actually matters and what’s just taking up room.
Since then, I’ve lived in four more small kitchens, helped a dozen friends optimize theirs, and made every possible mistake along the way. I’ve bought organization systems that made things worse, installed shelves that fell down under the weight of coffee mugs, and wasted money on solutions that looked great on Instagram but were completely impractical for actual cooking.
What follows isn’t Pinterest inspiration. It’s what genuinely works when you’re trying to cook real meals in a kitchen the size of most people’s closets.
Vertical Space Is Your Secret Weapon (But Only If You Do It Right)
Everyone tells you to “use vertical space” in a small kitchen. Almost no one tells you how to actually do this in a way that doesn’t look terrible or become wildly impractical.
The basic principle is correct: in a small kitchen, you have very little floor space and counter space, but you probably have blank wall space doing absolutely nothing. That wall space is free real estate that most people completely ignore.
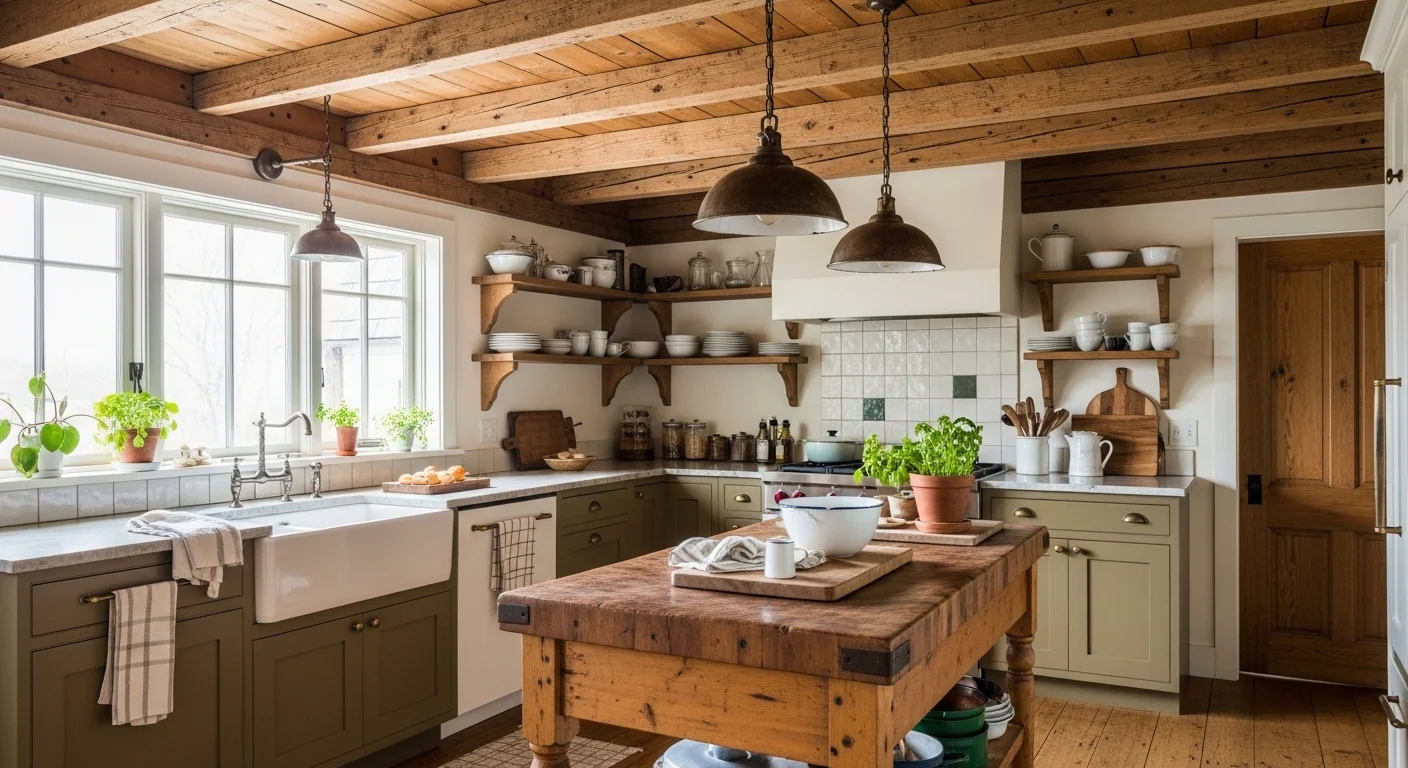
I installed my first set of open shelves seven years ago in a kitchen with exactly two cabinets. Those shelves are still the single best decision I’ve made in any kitchen I’ve ever had. But there are rules.
The Open Shelving Rules Nobody Tells You
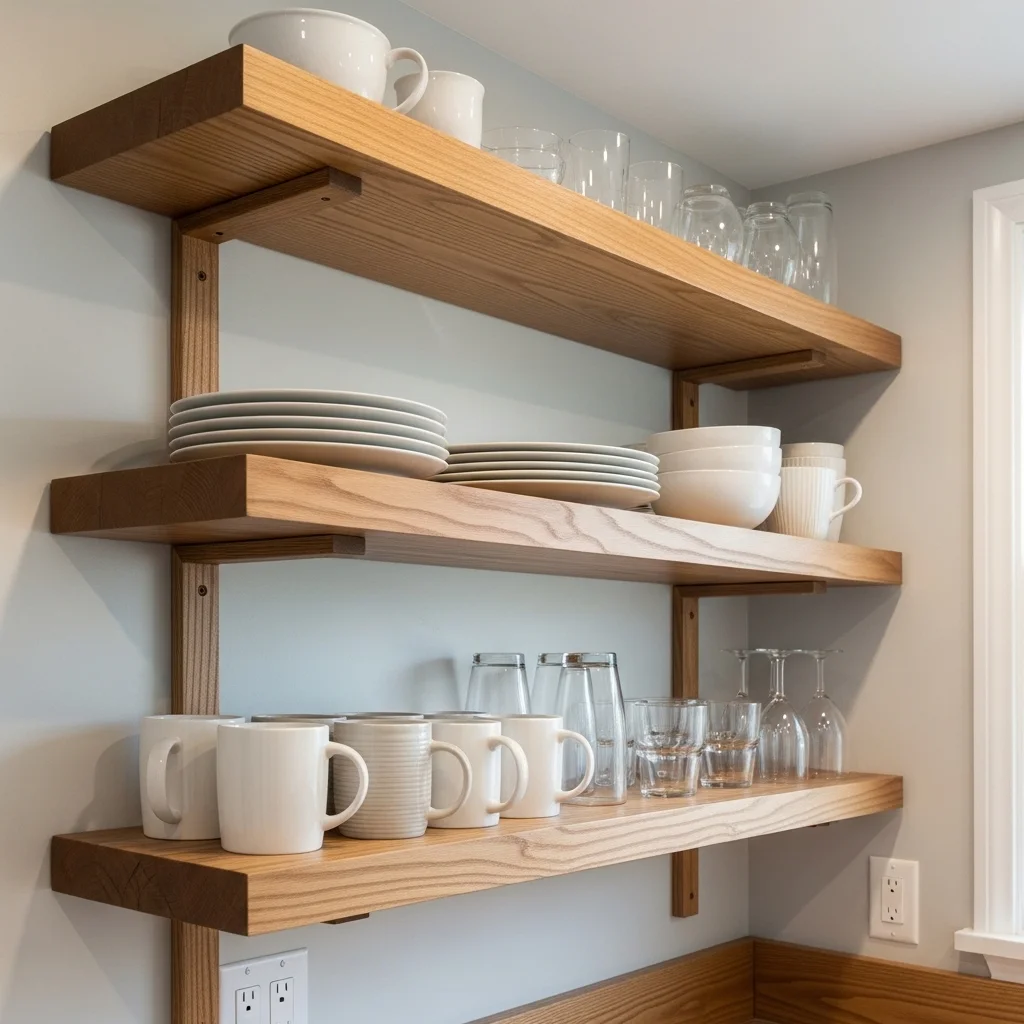
Install them higher than feels natural. Most people mount shelves at eye level or just above. This wastes the most valuable space in your kitchen, the space where you actually work. Your shelves should start at least 18 inches above your counter, preferably 20-24 inches. This leaves room underneath to actually use your counter without banging your head or feeling claustrophobic.
Go deeper than you think. Standard decorative shelves are 8-10 inches deep. That’s useless in a kitchen. You need 12-inch minimum, ideally 14-inch shelves to hold actual plates, bowls, and mugs without things falling off every time you reach for something.
Use three shelves, not two. Two shelves create big awkward gaps that waste space. Three shelves, spaced 12-14 inches apart, maximize your vertical storage without making the wall feel crowded. I have my everyday dishes on the middle shelf (easiest to reach), mugs and glasses on the bottom shelf, and things I use less frequently on the top.
The cost breakdown: Two 48-inch solid wood shelves with brackets cost me about $75 at Home Depot. Installation took my friend about 45 minutes with a drill. That $75 investment gave me storage for approximately 30 dishes, 12 mugs, and 8 glasses. I literally did not have space for them anywhere else.
The downside everyone mentions: dust and grease. Yes, open shelves get dustier than closed cabinets. In practice, this matters way less than you think. The dishes you use every day never sit long enough to get dusty. The ones on the top shelf I wipe down once a month when I use them. It takes 30 seconds. This is an acceptable trade-off for functional storage.
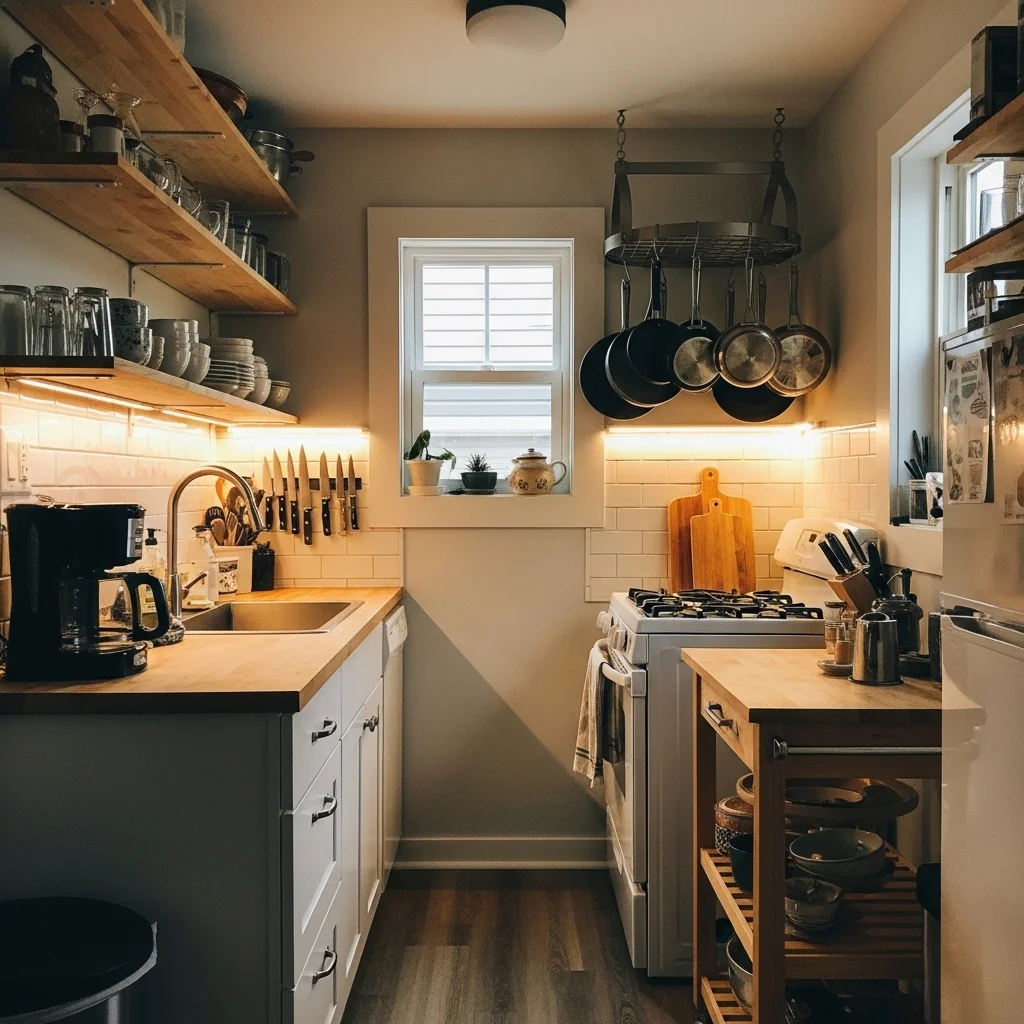
Pot Racks and Hanging Storage
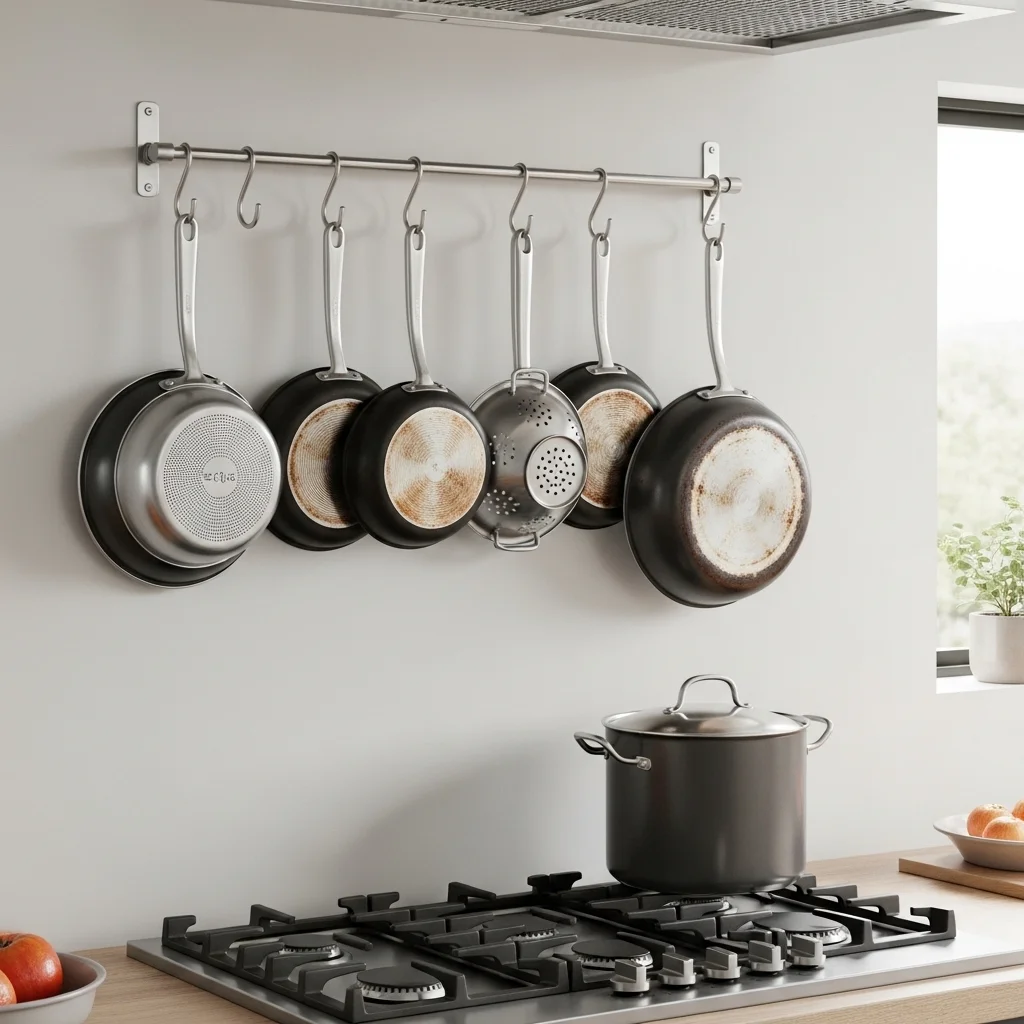
I resisted a pot rack for a year because I thought they looked cluttered and restaurant-y. I was wrong. A ceiling-mounted or wall-mounted pot rack was the second-best space-saving decision I made.
Here’s why: pots and pans are bulky and awkward to store. They don’t stack well. They take up enormous amounts of cabinet space. Getting them out of your cabinets frees up room for other things and makes them infinitely easier to grab when you’re cooking.
I installed a simple wall-mounted rack with 8 hooks for $35. It holds 6 pans, a colander, and a large pot. That’s approximately 4 cubic feet of cabinet space I got back.
The trick is choosing the right spot. Don’t put it where you’ll constantly bang your head. I mounted mine on the wall next to my stove, about 6 feet high. High enough that I don’t hit it, low enough that I can easily grab what I need.
If you’re renting and can’t drill into ceilings, a wall-mounted option with proper anchors works just as well. I’ve also seen people use a sturdy tension rod under upper cabinets with S-hooks, though this only works if your cabinets are strongly mounted.
The Cart Solution (And Why Most People Get It Wrong)
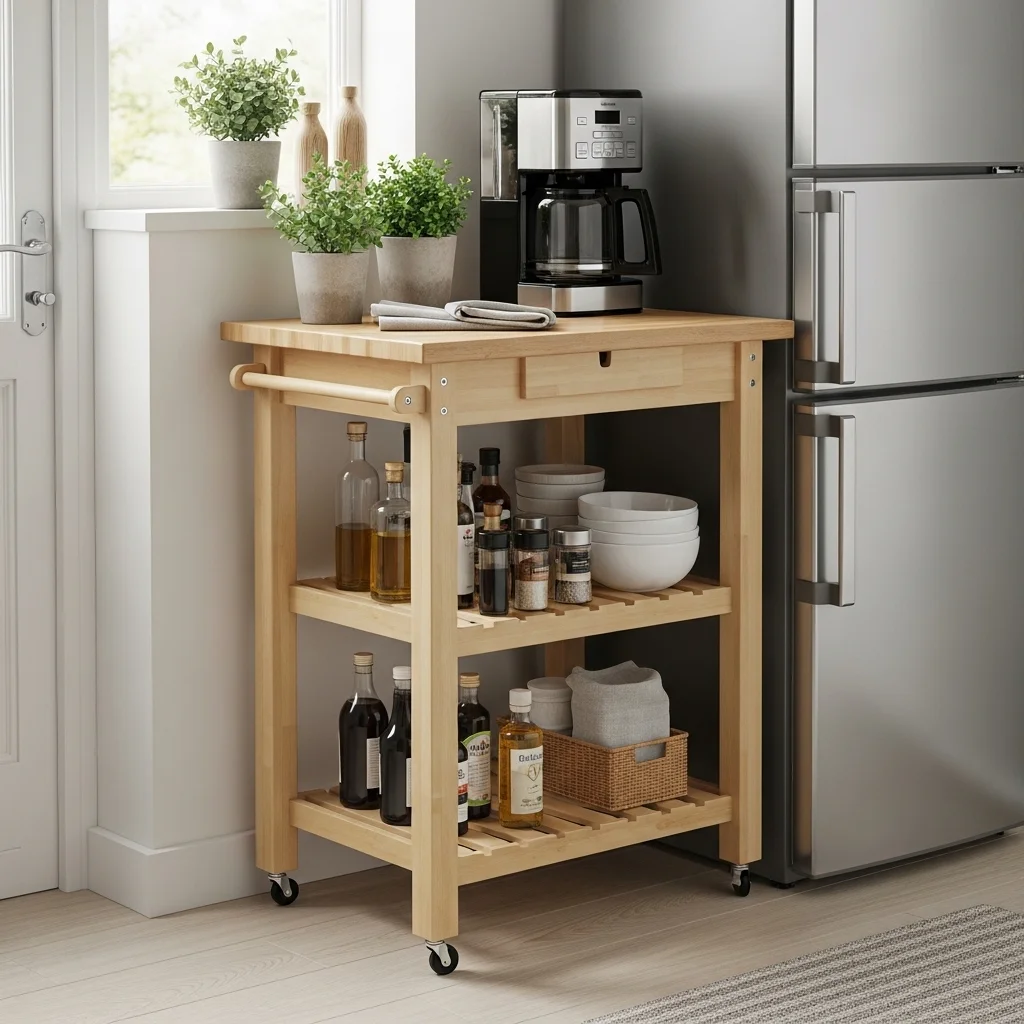
Kitchen carts are everywhere now, and for good reason—they add counter space and storage in a small footprint. But most people buy the wrong cart and use it wrong.
The standard advice is to get a cart with wheels so you can move it around. In my experience, this is backwards for most small kitchens. A cart that moves sounds flexible, but in reality, in a small kitchen, there’s usually only one place the cart can actually go. Mine lives in the exact same spot 99% of the time because there’s literally nowhere else to put it without blocking the fridge or the stove.
What actually matters: the top surface, the height, and the storage.
The top needs to be real counter space. Wood or butcher block that you can actually prep on, not decorative tile or metal mesh. I’ve had both. The mesh top looked cool and was completely useless for actual cooking. I could barely set a cutting board on it without it rocking.
Height matters more than you think. Most kitchen carts are 36 inches tall, standard counter height. This is correct. I once bought a cheaper cart that was only 32 inches tall because it was on sale. Having a prep surface 4 inches lower than my counter was incredibly annoying. I constantly leaned over awkwardly. I sold it three months later.
The storage should be open or have drawers, not cabinets. In a small kitchen, you’re constantly moving and reaching. Cabinets with doors that swing open are annoying and block your already-limited space. Open shelves or pull-out drawers are infinitely more practical.
My current cart cost $180 from IKEA (the FÖRHÖJA, if you’re curious). It’s solid birch, 36 inches tall, has three shelves, and the top is genuinely useful prep space. I use it as my coffee station, breakfast prep area, and extra storage for oils, spices, and things I use daily. It essentially gave me 4 square feet of floor space that now works as both counter and storage.
The placement rule: your cart should create a work triangle with your stove and sink, not block it. I’ve seen people put carts in the middle of small kitchens and completely destroy the workflow. Mine sits against the wall next to my fridge, creating an extended prep area.
Drawer Organizers Are Worth It (But Not The Expensive Ones)

I spent years with chaotic junk drawers full of tangled whisks, mysterious tools I never used, and seventeen different wooden spoons. Then I spent $45 on drawer organizers and immediately regretted not doing it five years earlier.
The difference between an organized drawer and a chaotic one in a small kitchen is massive. When you have limited storage, every drawer needs to be maximized. If you’re digging through a pile of stuff to find the can opener three times a week, you’re wasting time and mental energy.
Don’t buy the expensive custom drawer organization systems. They’re overpriced and often don’t fit standard drawers well. Instead, get a set of adjustable bamboo drawer dividers for $20-30. They expand to fit your drawer size and create compartments for different categories.
My system:
- One drawer for cooking utensils (spatulas, spoons, tongs, whisk)
- One drawer for prep tools (can opener, peeler, measuring spoons, kitchen scissors)
- One drawer for miscellaneous (batteries, twist ties, takeout menus, rubber bands)
Before I organized, I had three drawers full of chaos. After, I had three drawers where I could find anything in under five seconds. The mental relief of this is hard to overstate.
The same principle applies to deeper drawers. I use an expandable pot lid organizer in one deep drawer. It holds 8 lids vertically instead of them rattling around loose. This cost $12 and saved me from the twice-weekly avalanche of lids falling out when I opened the drawer.
Cabinet Space: What Actually Belongs Where
Small kitchens force you to be ruthless about what you keep and where you put it. I learned this through painful trial and error.
The prime real estate rule: The cabinets and drawers closest to your stove and main prep area should hold only things you use multiple times per week. Everything else goes in the harder-to-reach spots.
Most people violate this constantly. They store the waffle maker they use twice a year in a prime lower cabinet, while everyday plates live in an upper cabinet they need a step stool to reach. This is backwards.
I did a full audit of my kitchen once I put a piece of tape on everything I used for two weeks. At the end, anything without tape got moved to the highest, most inconvenient storage or donated. It was eye-opening. The garlic press, I thought I used all the time? Zero tape. The rice cooker I swore was essential? Used once.
My current cabinet organization:
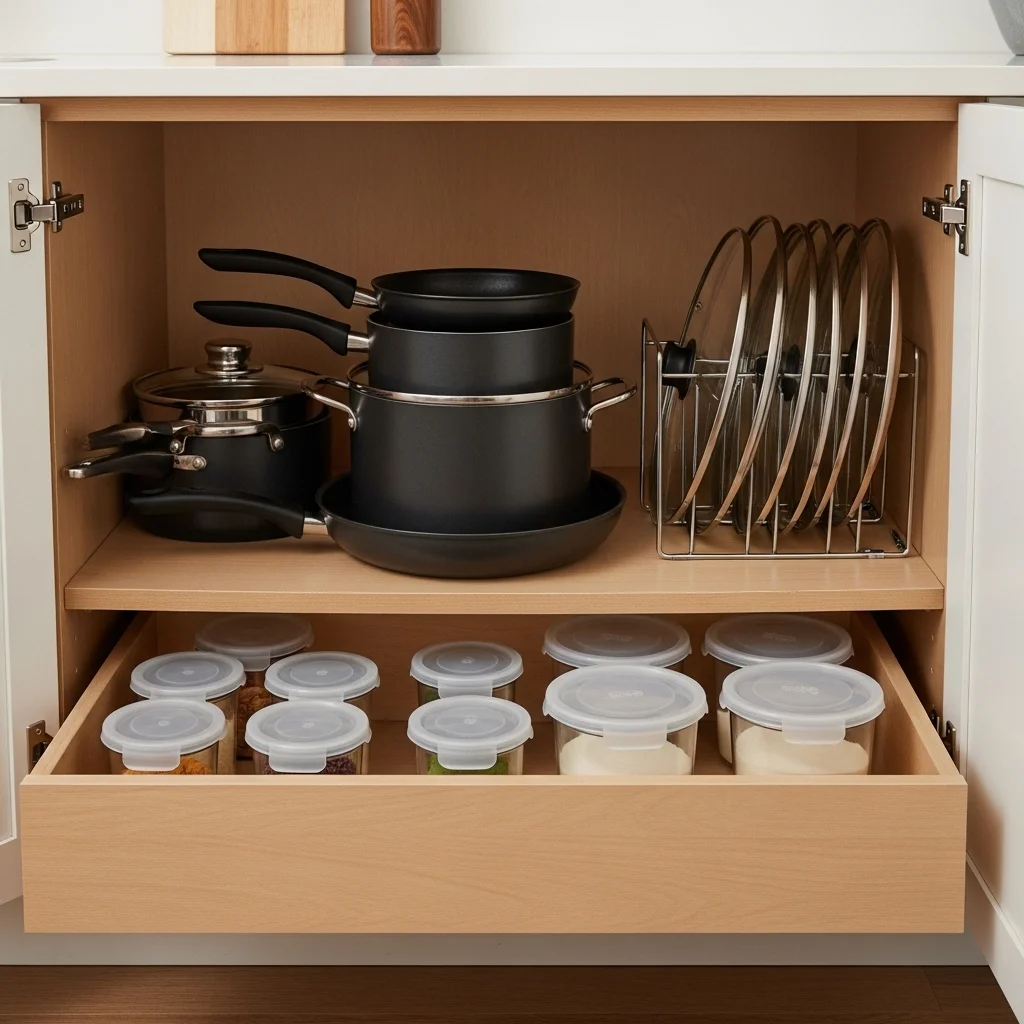
Lower cabinets (easiest to access):
- Pots and pans I use weekly (3 pans, 2 pots)
- Mixing bowls
- Food storage containers with matching lids (this is crucial—lids and containers must be together or you’ll waste 10 minutes looking for matches)
Upper cabinets near stove:
- Everyday plates, bowls, and mugs (these are actually on open shelves now, but same principle)
- Coffee, tea, breakfast items
- Oils, vinegars, and frequently used spices
Upper cabinets far from stove:
- Glasses and cups
- Backup supplies (extra coffee, bulk pasta, canned goods)
- Baking supplies I use monthly
Top shelves and awkward corners:
- Serving platters for holidays
- Appliances used occasionally (hand mixer, blender I barely use)
- Extra supplies and backstock
The difference this makes in actual cooking is enormous. When everything you need is in easy reach, cooking becomes less stressful. When you’re constantly climbing on counters or digging through cabinets, even simple meals become annoying.
The Appliance Audit: What’s Actually Worth The Space
This is where I’ve made my most expensive mistakes. In a small kitchen, every appliance that lives on your counter is taking up your most valuable real estate. Every appliance stored in a cabinet is taking up storage you desperately need.
The question you need to ask for every single appliance: does this earn its keep?
I’ve owned, used, and eventually donated or sold all of the following because they didn’t earn their space:
- Stand mixer (used twice a year, took up 3 cubic feet of cabinet space)
- Bread maker (novelty wore off after three loaves)
- Food processor (too big, too annoying to clean, a good knife worked better)
- Electric kettle (I just boiled water in a pot)
- Toaster oven (redundant with my actual oven)
What I kept and use constantly:
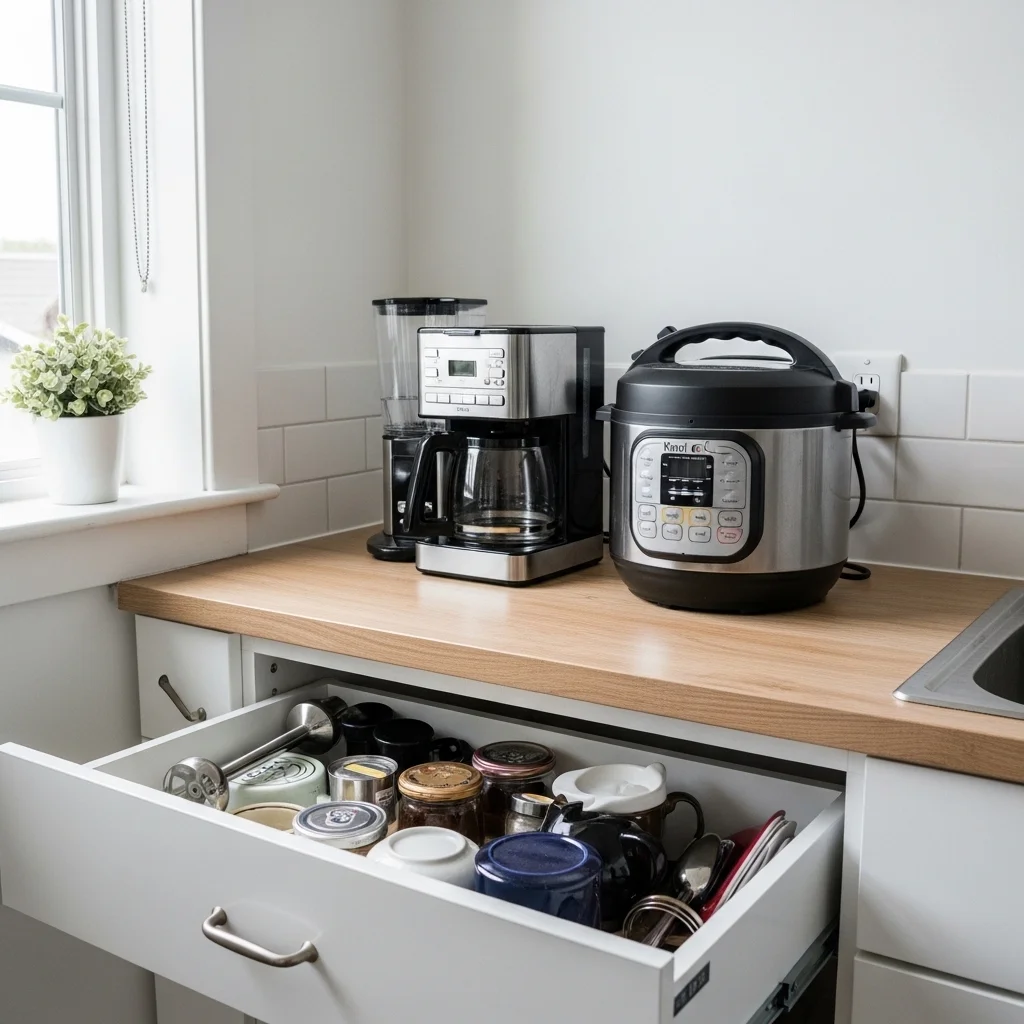
- Coffee maker (daily use, earns its counter space)
- Instant Pot (replaced my rice cooker, slow cooker, and pressure cooker, lives on the counter)
- Immersion blender (tiny, stores in a drawer, does 80% of what my food processor did)
The math is simple: if you use something daily or multiple times per week, it can live on your counter. If you use it weekly, it needs to be easily accessible in a cabinet. If you use it monthly or less, it goes in the hardest-to-reach storage. If you use it less than once a month, you probably don’t need it.
I know this feels extreme. But in a 47-square-foot kitchen with 18 inches of counter space, keeping a stand mixer on the counter because “someday I might make bread” meant I had no space to actually cook the meals I made every single day. That’s a bad trade.
Magnetic Strips, Hooks, and Other Wall-Mounted Storage
The inside of cabinet doors, the sides of cabinets, and the space under upper cabinets are all unused storage in most kitchens.
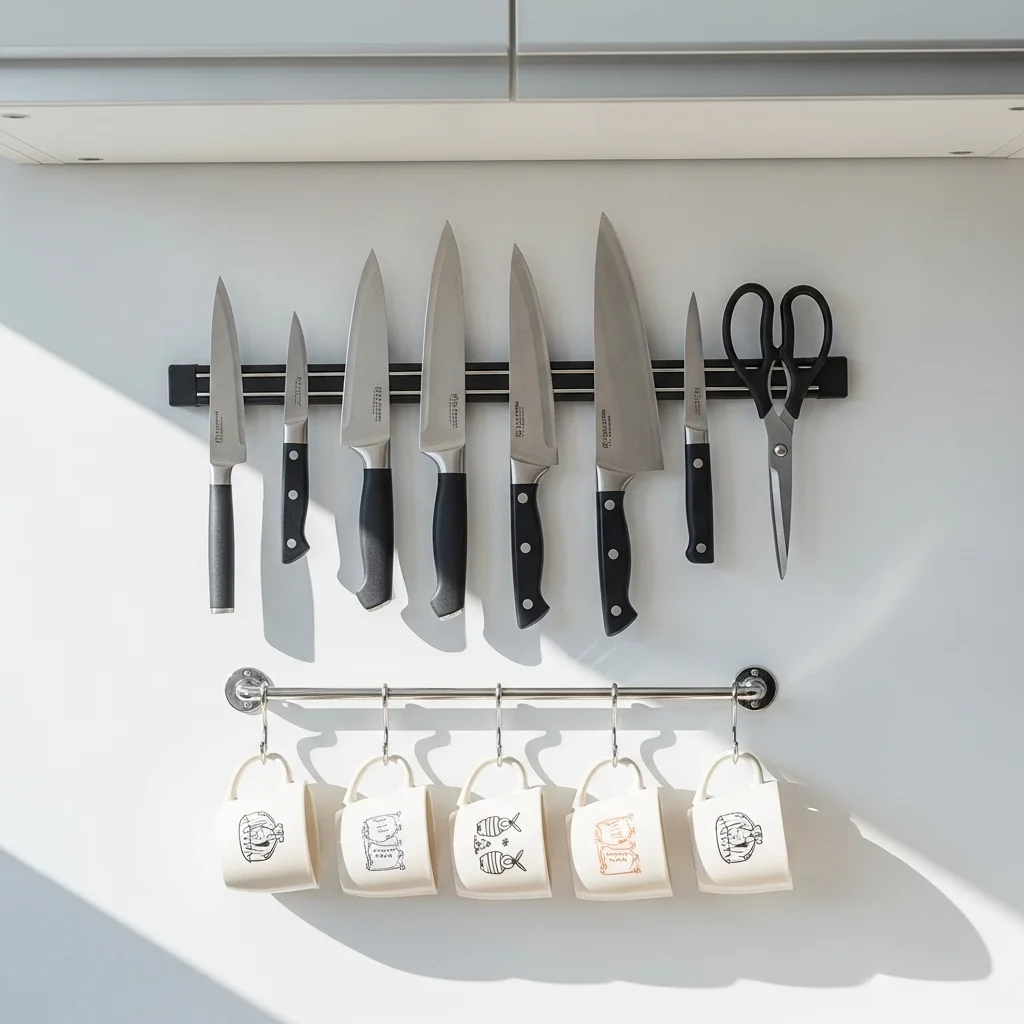
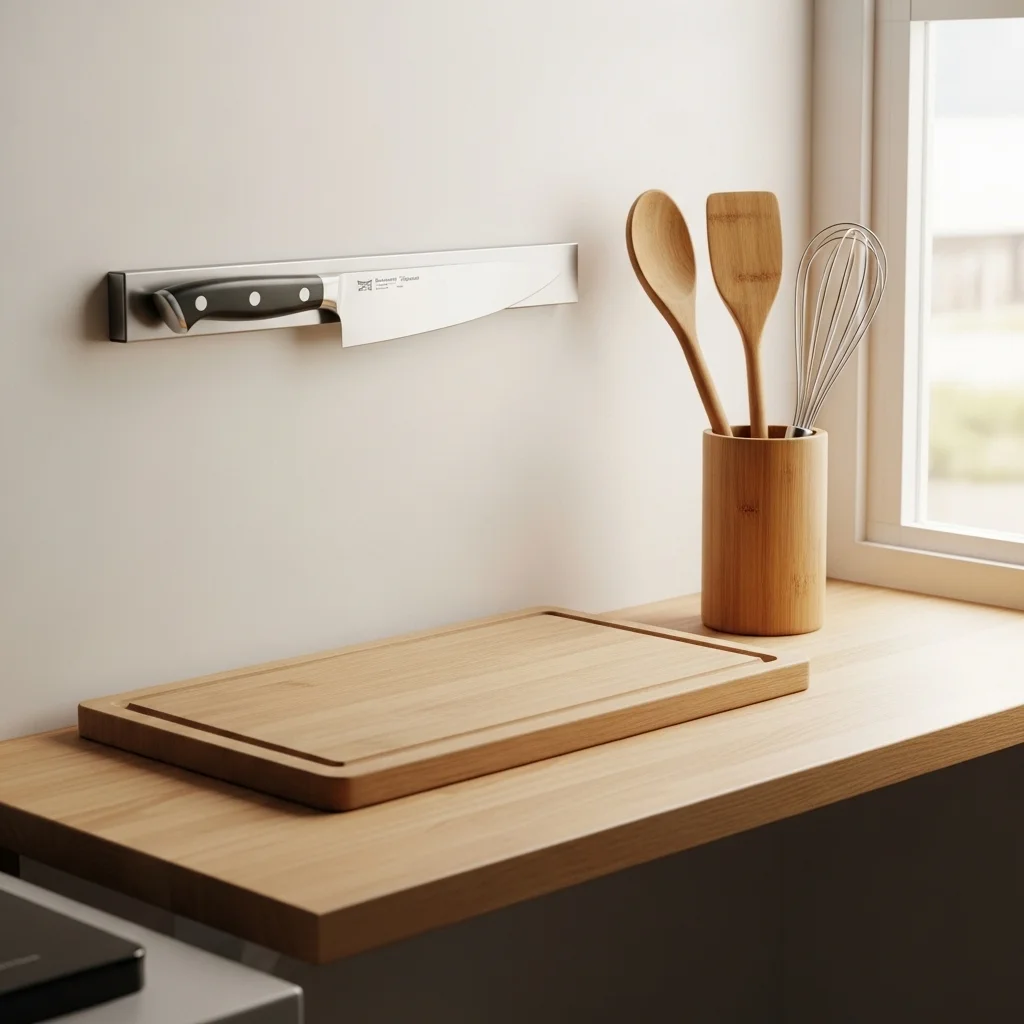
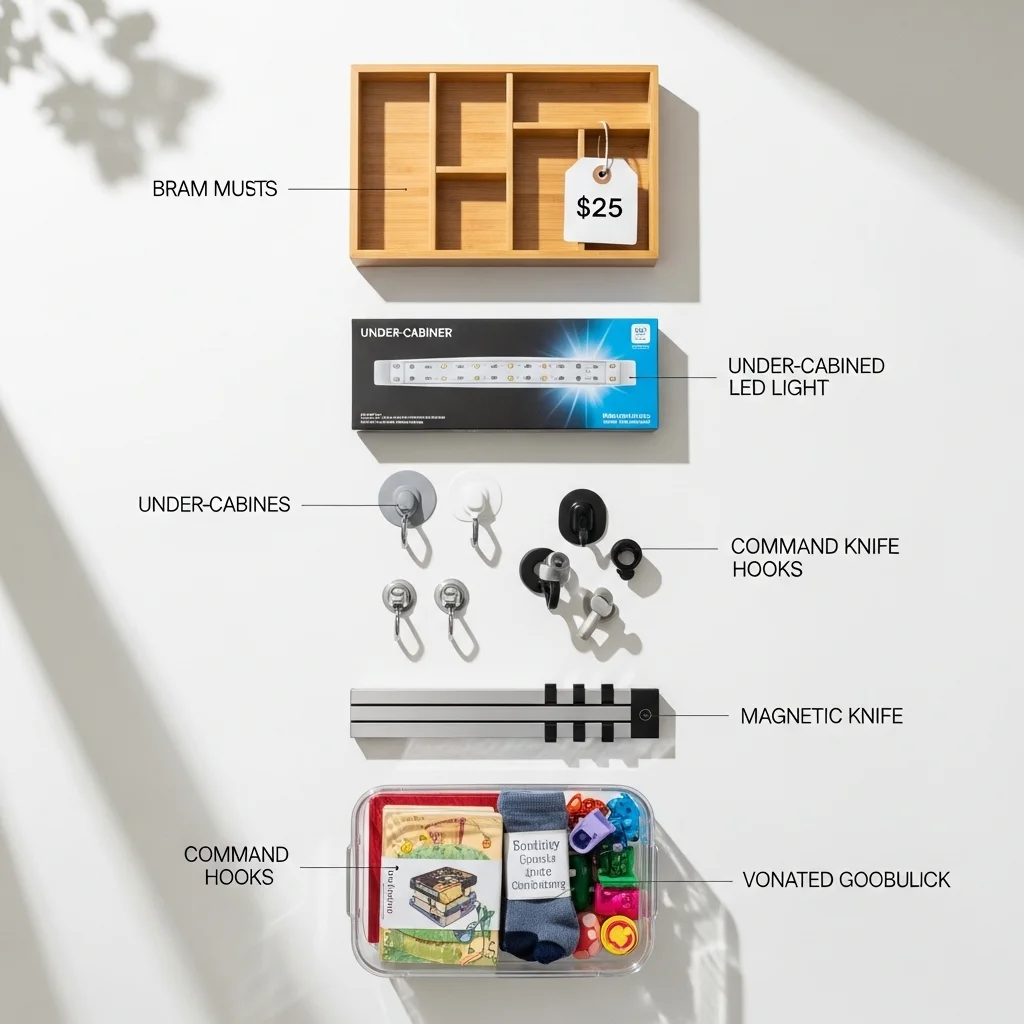
Magnetic knife strip: This sounds bougie, but it’s incredibly practical. A magnetic strip mounted on the wall holds 8-10 knives in about 4 inches of vertical wall space. This is dramatically more space-efficient than a knife block (which takes up 6-8 inches of precious counter space) or storing knives loose in a drawer (which is dangerous and dulls the blades).
I installed one for $18 seven years ago. It’s still perfectly functional. It holds 6 knives and my kitchen scissors.
Command hooks inside cabinet doors: I have three hooks inside my under-sink cabinet door that hold cleaning gloves, small brushes, and dish towels. This cost approximately $6 and uses space that was previously just the back of a door.
Under-cabinet hooks: I mounted a row of small hooks under my upper cabinet to hang mugs. This freed up an entire shelf in my cabinet. The hooks cost $8 for a set of 10.
Adhesive organizers: I have a small adhesive basket stuck to the inside of one cabinet door that holds sponges, scrub brushes, and dish soap. Again, using space that was doing nothing.
None of these are revolutionary. All of them are cheap. Cumulatively, they probably added 2-3 cubic feet of functional storage to my kitchen for under $50 total.
Color, Light, and The Psychology of Small Spaces
This is going to sound soft and decorative after all the practical storage talk, but the visual feel of your small kitchen actually matters for functionality.
A dark, cluttered-feeling kitchen makes you not want to cook. A bright, organized kitchen makes cooking feel less overwhelming. I’ve lived in both, and the psychological difference is real.
Paint or don’t paint, but choose wisely. The standard advice is to paint small kitchens white to make them feel bigger. This is fine but not mandatory. I’ve had good experiences with pale gray, soft sage green, and cream. The actual rule is: avoid dark colors on walls in a genuinely tiny kitchen. Dark colors absorb light and make the space feel smaller.
If you’re renting and can’t paint, you can still control color through what you display. White dishes on open shelves feel cleaner and lighter than a mix of colorful mismatched plates. This doesn’t mean you need to replace all your dishes, but it’s worth considering when you buy new ones.
Lighting is not optional. The single worst thing about most small kitchens is terrible lighting. One dim overhead light is not sufficient for cooking.
I added two things that transformed my kitchen’s functionality:
- Under-cabinet LED strip lights ($28 for a kit). These illuminate your counter workspace and make food prep infinitely easier. I can actually see what I’m chopping now. Installation took 20 minutes. They’re adhesive strips that plug into an outlet.
- A bright LED bulb in the overhead fixture (replacing the 60-watt yellow bulb that came with the apartment). This cost $8 and made an enormous difference. The room felt instantly larger and cleaner.
Good lighting doesn’t just make the space feel bigger, it makes cooking easier and safer. Chopping vegetables in dim light is annoying and mildly dangerous.
The Stuff You Don’t Actually Need
I’ve found that small kitchens force honesty about what you actually use versus what you think you should have.
Things I thought were essential that I lived without for years:
- Dishwasher (hand washing in a small kitchen is often faster than loading/unloading)
- Microwave (I used the stove or oven; this freed up significant counter space)
- Full-size oven (I used a countertop toaster oven for everything for two years in one apartment)
- Matching dish sets (I had 6 plates, 6 bowls, 6 mugs, all different worked fine)
Things that seemed optional but were actually essential:
- Really good knife (one good chef’s knife does 90% of cutting tasks)
- Cutting board that fit my counter (I found one that was exactly 16 inches long to fit my limited space)
- Immediate cleaning habit (in a small kitchen, dishes pile up instantly; cleaning as you cook is mandatory)
The minimalist kitchen philosophy isn’t about deprivation; it’s about only keeping things that actively contribute to your ability to cook and eat well. Every item that doesn’t earn its keep is clutter that makes your space harder to use.
Countertop Zones: Making Limited Space Work
With limited counter space, you can’t just scatter things randomly. You need zones.
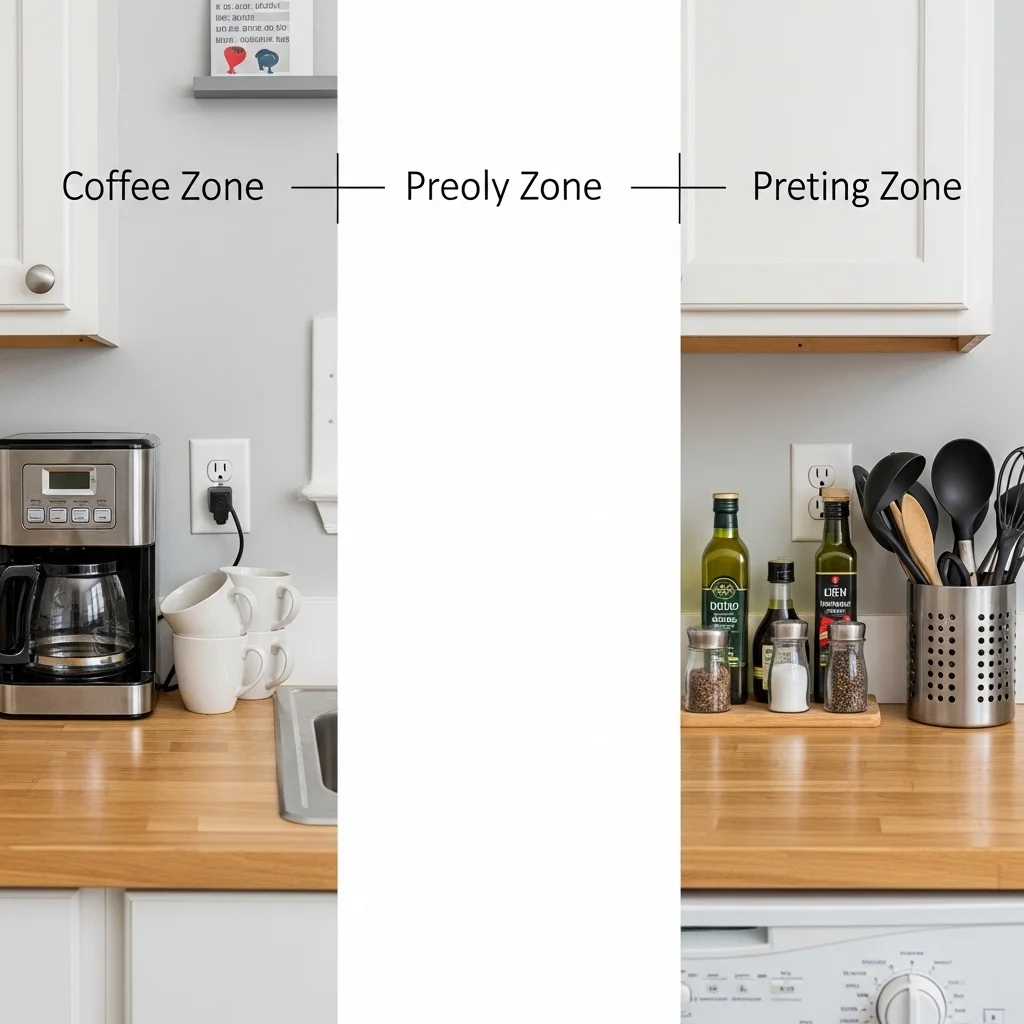
In my current kitchen, I have approximately 4 feet of continuous counter space. Here’s how it breaks down:
Coffee zone (12 inches): Coffee maker, mugs on hooks underneath the cabinet above, coffee and filters in the cabinet directly above. Everything needed for morning coffee in one contained area.
Prep zone (24 inches): This is my main workspace. I keep this completely clear except when actively cooking. Cutting board, knife, and ingredients come out, get used, and get put away. This zone never has permanent residents.
Stove-adjacent zone (12 inches): Olive oil, salt, pepper, and frequently used spices in a small rack. Wooden spoon holder with my three most-used utensils. This is within arm’s reach of the stove.
The “everything has a home” principle is cliché but critical in small kitchens. If something doesn’t have a designated spot, it ends up as counter clutter, which in a small kitchen immediately makes the whole space feel chaotic.
Real-World Trade-Offs and Limitations

I want to be honest about what small kitchen living actually means, because a lot of guides make it sound easier than it is.
You will compromise on some things. I can’t cook Thanksgiving dinner in my small kitchen. I can’t comfortably have three people cooking at once. I can’t store bulk quantities of anything. These are real limitations.
Some solutions are annoying. Getting things from high shelves requires a step stool. I trip over my step stool regularly. Washing dishes by hand every day gets old. Not having a dishwasher means you can’t just hide dirty dishes; you have to deal with them.
Organization requires maintenance. The systems I’ve described work, but only if you actually maintain them. If you’re not naturally tidy, a small kitchen will force you to become tidier or you’ll live in constant chaos. There’s no middle ground.
Not everything has a perfect solution. I still don’t have great storage for baking sheets (they lean awkwardly against the side of a cabinet). My spice situation is imperfect I use a drawer organizer but still have to dig sometimes. Small kitchens mean accepting some level of imperfection.
What Actually Worked: My Priority List
If you’re overwhelmed and don’t know where to start, here’s what I’d prioritize based on cost and impact:
Free or nearly free:
- Audit what you own and donate/sell anything used less than monthly
- Reorganize cabinets by frequency of use
- Clear counters of anything not used daily
- Clean as you cook (this is a habit, not a purchase)
Under $50:
5. Drawer organizers ($25)
6. Under-cabinet lighting ($28)
7. Command hooks and magnetic strips ($20)
8. Better overhead light bulb ($8)
Under $150:
9. Open shelving installation ($75)
10. Wall-mounted pot rack ($35)
11. Quality cutting board that fits your space ($25)
Larger investments:
12. Kitchen cart ($150-250)
13. One appliance that consolidates multiple functions (Instant Pot, quality blender, etc.) ($100-200)
You don’t need to do everything at once. I implemented these changes over about three years across different apartments. Each small improvement made the space more functional.
The Mindset Shift That Actually Helps
The biggest change for me wasn’t any specific product or organization system. It was accepting that a small kitchen requires a different approach to cooking and eating.
I batch-cook more because I don’t want to cook elaborate meals in a cramped space every night. I buy groceries more frequently in smaller quantities because I don’t have storage for bulk items. I use fewer pots and pans per meal because washing dishes in a small sink is annoying. I’ve become a better cook because I have to plan and think through meals instead of just throwing things together.
A small kitchen isn’t worse than a large kitchen. It’s just different. Once I stopped being frustrated by what my kitchen wasn’t and started working with what it actually was, everything got easier.
The goal isn’t to make your small kitchen feel big, that’s impossible. The goal is to make it feel functional, organized, and pleasant to use. Those are achievable in any-sized space.
The Bottom Line
Decorating a small kitchen for better space use isn’t really about decoration at all. It’s about ruthless functionality disguised as design.
Every decision about what stays, what goes, where things live, and what goes on walls should be driven by one question: Does this make cooking and cleaning easier or harder?
Pretty doesn’t matter if it’s impractical. The Instagram-worthy kitchen with twenty plants and decorative canisters of bulk grains looks amazing but would drive me insane to actually cook in. My kitchen, with open shelves of mismatched dishes and a utilitarian pot rack, photographs poorly but works beautifully for daily use.
Start with one small change this week. Just one. Reorganize one drawer. Install one shelf. Donate one appliance you never use. Notice if it helps. Then make another small change next week.
You don’t need a renovation. You don’t need expensive custom cabinets. You just need to be intentional about every single thing in your space, because in a small kitchen, everything matters.