
I still remember the first piece of furniture I tried to “upcycle” a beat-up dresser from my grandmother’s basement that I was convinced would become a showpiece. Armed with one can of spray paint and zero experience, I created what can only be described as a sticky disaster. The drawers wouldn’t open, the finish looked like orange peel, and I’m pretty sure some parts never actually dried.
That was twelve years ago. Since then, I’ve transformed countless pieces of old furniture into functional decor, made plenty more mistakes, and learned that reusing furniture is less about following Pinterest-perfect tutorials and more about understanding materials, having realistic expectations, and sometimes just embracing the character of imperfection.
Why Bother Reusing Old Furniture?
Before we dive into the how, let’s talk about the why because you’ll need motivation when you’re two hours into sanding and questioning all your life choices.
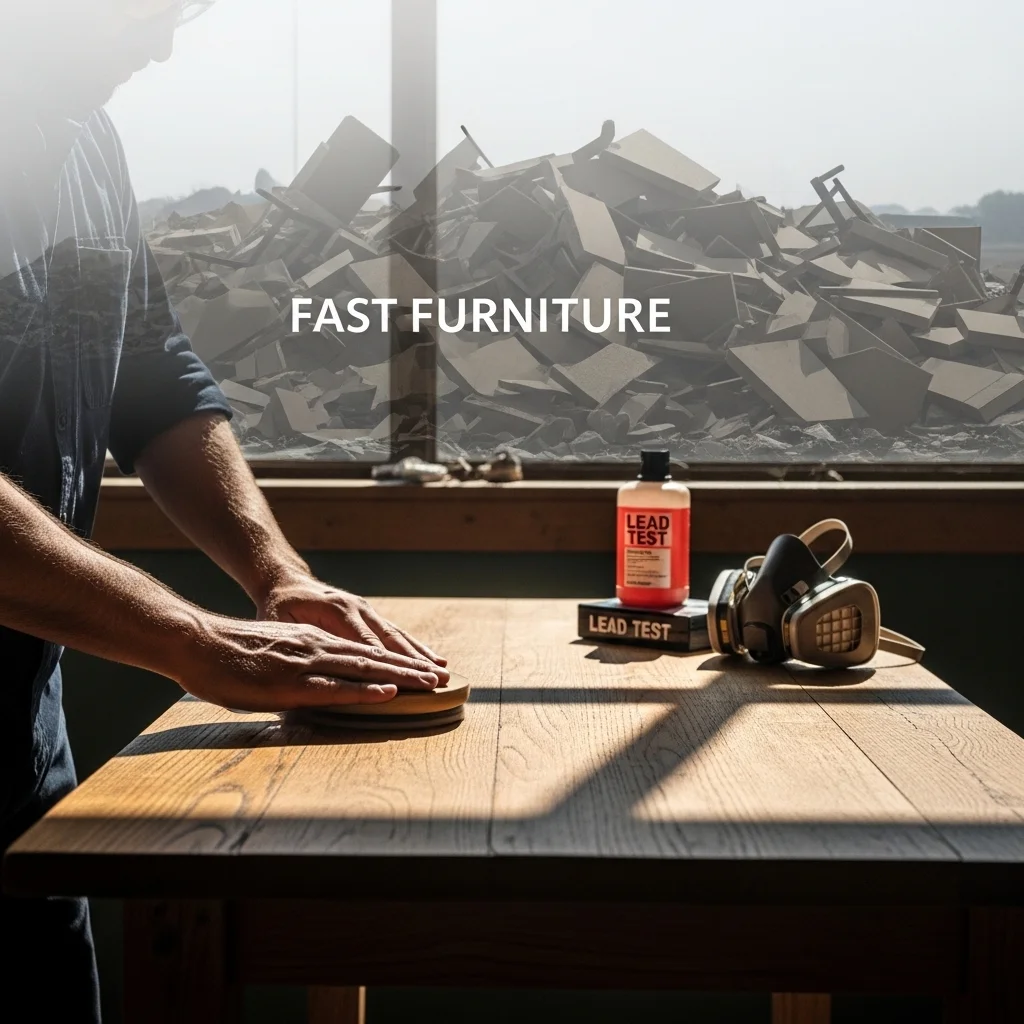
The environmental argument is compelling. Furniture accounts for a massive chunk of landfill waste, and the fast-furniture industry has environmental costs that would make you think twice about that $49 particleboard bookshelf. When you reuse existing furniture, you’re keeping solid pieces out of dumps and avoiding the resource consumption of new manufacturing.
But honestly? For most people, it comes down to money and uniqueness. A solid wood dresser from the 1960s might cost you $30 at an estate sale. New furniture of comparable quality would run $600 or more. And after you’ve refinished or repurposed that vintage piece, you have something nobody else owns not mass-produced, not available in every suburban home from Maine to California.
There’s also a learning curve benefit that surprised me. Understanding how furniture is constructed, how different finishes work, and how to use basic tools has made me infinitely more capable around the house in general. You start seeing possibilities instead of problems.
What Furniture Actually Works for Repurposing?

Not all old furniture deserves saving. I learned this the hard way with a 1990s particleboard entertainment center that literally crumbled when I tried to unscrew the hardware. Some pieces are genuinely garbage, and that’s okay.
Look for solid wood construction. Flip furniture over, open drawers, check inside cabinets. If you see actual wood grain (not printed-on patterns), dovetail joints in drawers, or substantial weight, you probably have something workable. Vintage pieces from the 1970s and earlier often have better bones than anything you’ll find at budget furniture stores today.
Mid-century dressers, farmhouse tables, wooden chairs, old doors, vintage trunks, and library card catalogs are goldmines. Even pieces with damaged surfaces can work if the structure is sound. Water rings, scratches, and outdated finishes are all fixable. Wobbly legs, cracked frames, or particle board that’s delaminating? Much harder to address.
One category I’ve had surprising success with: office furniture. Old filing cabinets, school desks, and industrial shelving have great bones and an aesthetic that’s weirdly trendy right now. I converted a 1960s metal filing cabinet into a bedside table that gets compliments constantly, and it cost me $15 plus an afternoon of work.
Essential Techniques You’ll Actually Use
Let me walk you through the core methods that come up repeatedly, with the kind of practical details you won’t find in those suspiciously perfect blog posts.
Painting and Refinishing
This is where most people start, and where I made my orange-peel disaster. Here’s what I wish someone had told me:
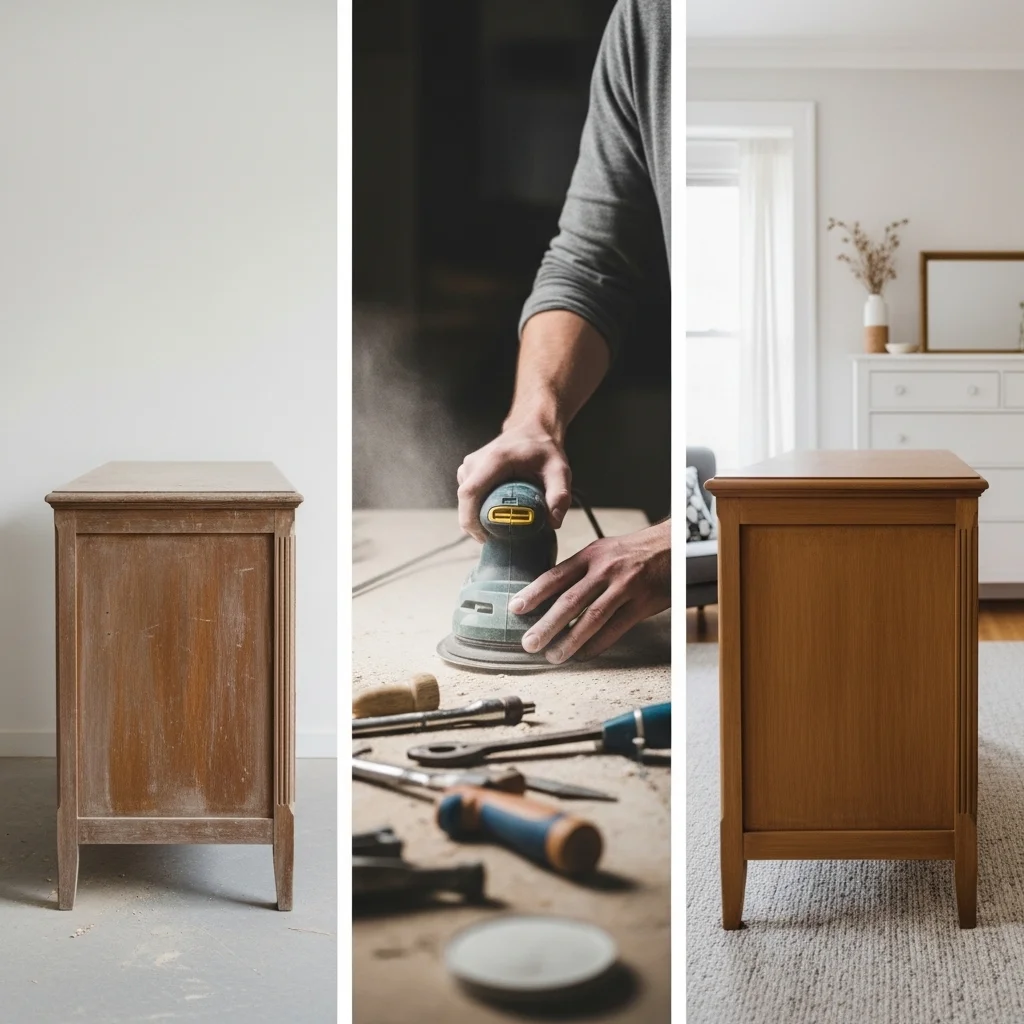
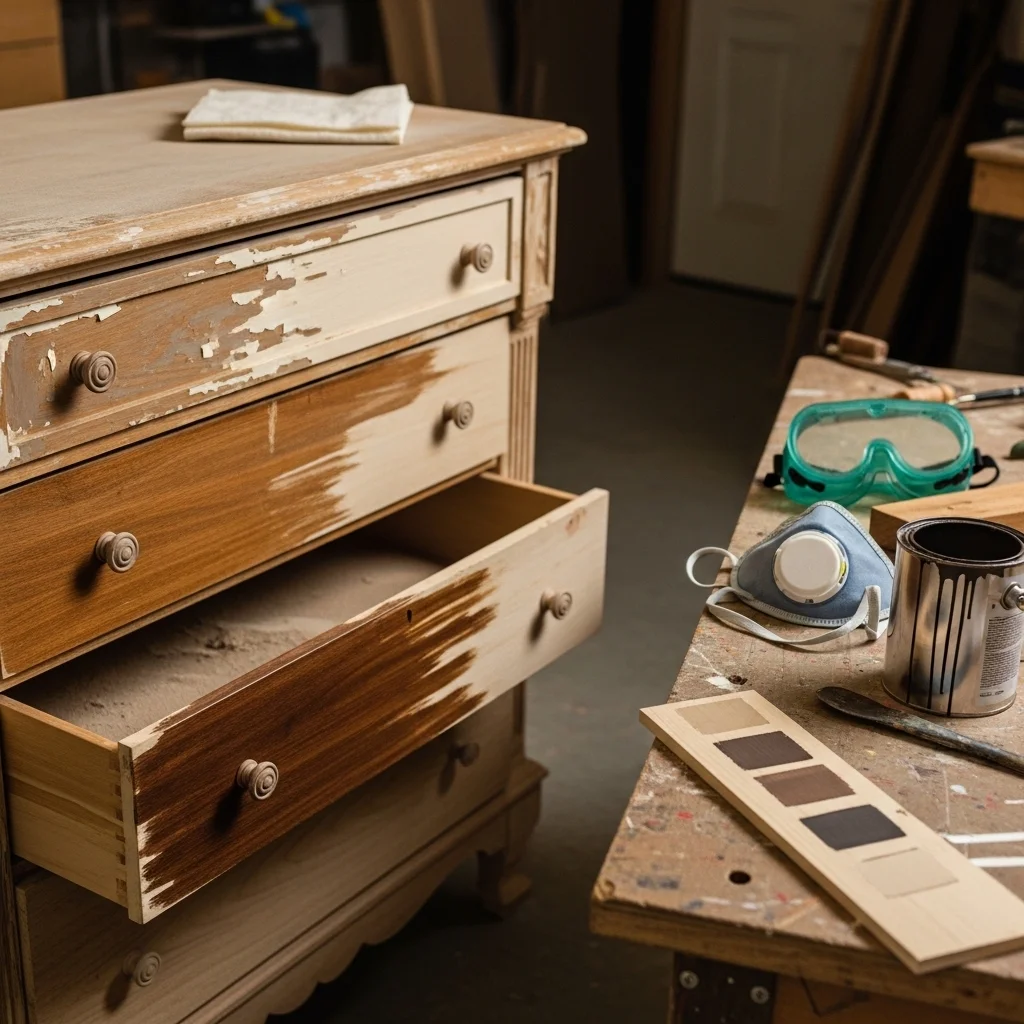
Surface preparation matters more than paint quality. You can use the fanciest paint on earth, but if you don’t prep properly, it’ll chip off or look terrible. For most pieces, this means cleaning thoroughly with TSP (trisodium phosphate) or a degreaser, then sanding. You don’t always need to sand to bare wood just rough up the surface enough for the new finish to grab.
I use 120-grit sandpaper for most work, maybe 80-grit if I’m removing a really stubborn finish. Higher grits like 220 are for smoothing between coats. The actual sanding is tedious, I won’t lie. Put on music or a podcast and accept that it takes as long as it takes.
For paint, chalk paint became trendy for a reason it adheres well without extensive prep. But it’s expensive, and honestly, a good primer plus quality latex paint works just as well for a fraction of the price. I typically use a bonding primer like Zinsser B-I-N, then two coats of satin or semi-gloss paint. The slight sheen hides imperfections better than flat paint and cleans more easily.
Spray paint works for small pieces or detail work, but getting an even coat on large surfaces requires technique. Light coats, constant motion, proper temperature and humidity it’s finicky. I’ve had better luck with foam rollers and brushes for bigger projects.
A note on waxing and distressing: The heavily distressed, waxed finish that was everywhere five years ago now looks dated to me. Trends move fast in decor. I’d suggest a cleaner finish that you can always distress later if you want, rather than over-committing to a look that might feel tired in two years.
Staining and Clear Finishes
When you have beautiful wood grain, paint feels criminal. Stripping old finish and restaining lets that character shine through.
Chemical strippers work but are genuinely unpleasant use them outside with gloves and a respirator. I’ve had better experiences with Citristrip, which is less caustic than traditional strippers but still gets the job done. You apply it thick, wait (longer than you think), then scrape off the gunk. It usually takes multiple applications.
Sanding can also remove finishes, but it’s labor-intensive and creates dust nightmares. For flat surfaces, an orbital sander speeds things up. For detailed pieces with curves and carvings, you’re mostly stuck with hand sanding and scrapers.
After stripping, sand smooth, then apply your stain. Test it on an inconspicuous spot first because wood species react differently. I ruined a nice table once by going too dark it looked muddy instead of rich. Stain color also looks different wet versus dry, so let test spots fully dry before committing.
For protection, polyurethane is durable but can yellow over time and has a plastic-y look some people dislike. I’ve been using water-based poly more lately less odor, no yellowing, though some argue it’s not quite as durable. For pieces that won’t see hard use, tung oil or Danish oil gives a more natural look and is foolproof to apply, though it offers less protection.
Reupholstering
This sounds intimidating, but basic reupholstering is surprisingly doable. I’m not talking about a Chesterfield sofa with button tufting that’s genuinely difficult. But dining chairs, bench seats, and simple cushions? Totally manageable.
You need fabric (more than you think, measure generously), a staple gun, scissors, and padding if the original foam is shot. Remove the seat, strip off the old fabric, check if the foam needs replacing, then wrap your new fabric tightly and staple from the center of each side outward, working toward the corners. The corners are the tricky part, you’re essentially gift-wrapping the seat. There are multiple folding techniques; I’d recommend watching a video for this part because it’s hard to explain in text.
I’ve had good luck sourcing fabric from unexpected places. Upholstery fabric is expensive at dedicated stores, but you can use heavy curtain fabric, canvas drop cloths, even outdoor fabric. I reupholstered a set of dining chairs in vintage grain sacks I found at an antique store cost $6 per chair and they look fantastic.
One warning: springs. If you open up a piece and find springs, you might be in over your head. Eight-way hand-tied springs are an art form that requires specific knowledge. Either find a professional or pick a different project.
Repurposing for Different Functions
This is where creativity really comes in using furniture in ways it wasn’t originally intended.
Old dressers make excellent bathroom vanities. You cut a hole in the top for the sink, seal the wood around plumbing areas, and install the fixture. The drawers provide storage, and you get a unique vanity for way less than a custom piece. I did this in my powder room with a 1950s dresser, and the biggest challenge was convincing my plumber it would actually work. It did.
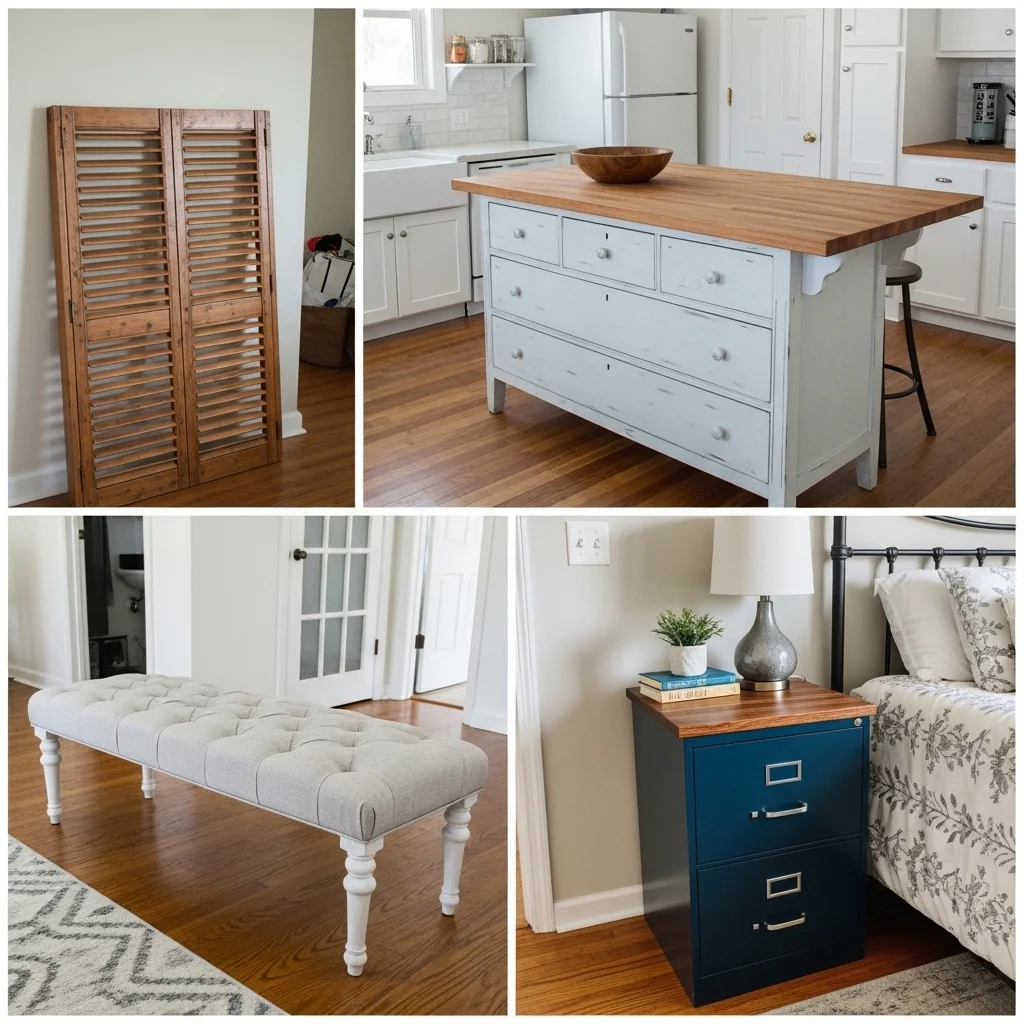
Wooden ladders become blanket racks or towel holders. Headboards turn into hall trees or coat racks. I’ve seen old doors become table tops, shutters become room dividers, and a vintage crib (with the side removed) transform into a desk.
The trick is looking at the structural elements rather than the original purpose. That china cabinet isn’t just for dishes it could be a bathroom linen closet, a craft supply organizer, or a display case for collectibles. Those dining chairs with broken seats? Cut off the legs to different heights, make them into shelves or plant stands.
Real Projects That Worked (And Some That Didn’t)
Let me share some specific examples from my own home, including the failures, because you learn more from what goes wrong.
Success: The Entry Bench
I found a coffee table with beautiful turned legs at Goodwill for $8. The top was water-damaged beyond repair, but those legs were solid maple. I removed the top, built a simple frame, added a piece of plywood, foam, and fabric, and created an upholstered entry bench. The entire project cost maybe $35 and an afternoon. This piece gets compliments every time someone visits.
The key was recognizing that the legs had value even when the rest didn’t. I see people pass over damaged furniture without considering that parts might be salvageable.
Success: The Kitchen Island
Two old dressers of similar height, a butcher block countertop, some paint, and new hardware became a functional kitchen island with tons of storage. I positioned them with a gap between for open shelving, secured them together with brackets, and mounted the counter on top.
This project took a full weekend and was genuinely challenging. Getting both dressers level took forever old houses have uneven floors, and even small height differences are noticeable on something this large. But the result is sturdy, unique, and cost about one-third what a comparable island would have.
Failure: The Headboard That Wasn’t
I tried to make a headboard from old shutters. I’d seen dozens of beautiful examples online and thought, “How hard could it be?”
Turns out, shutters vary wildly in size, and getting them to line up neatly requires more precision than I apparently possess. Plus, mounting the assembled piece securely to the wall was more complicated than I anticipated. The whole thing looked crooked and felt unstable. I eventually took it apart and used the shutters individually as decorative elements, which actually worked fine.
The lesson? Some Pinterest projects are genuinely harder than they appear, or they’ve been heavily staged for photos. Don’t feel bad if something doesn’t work out.
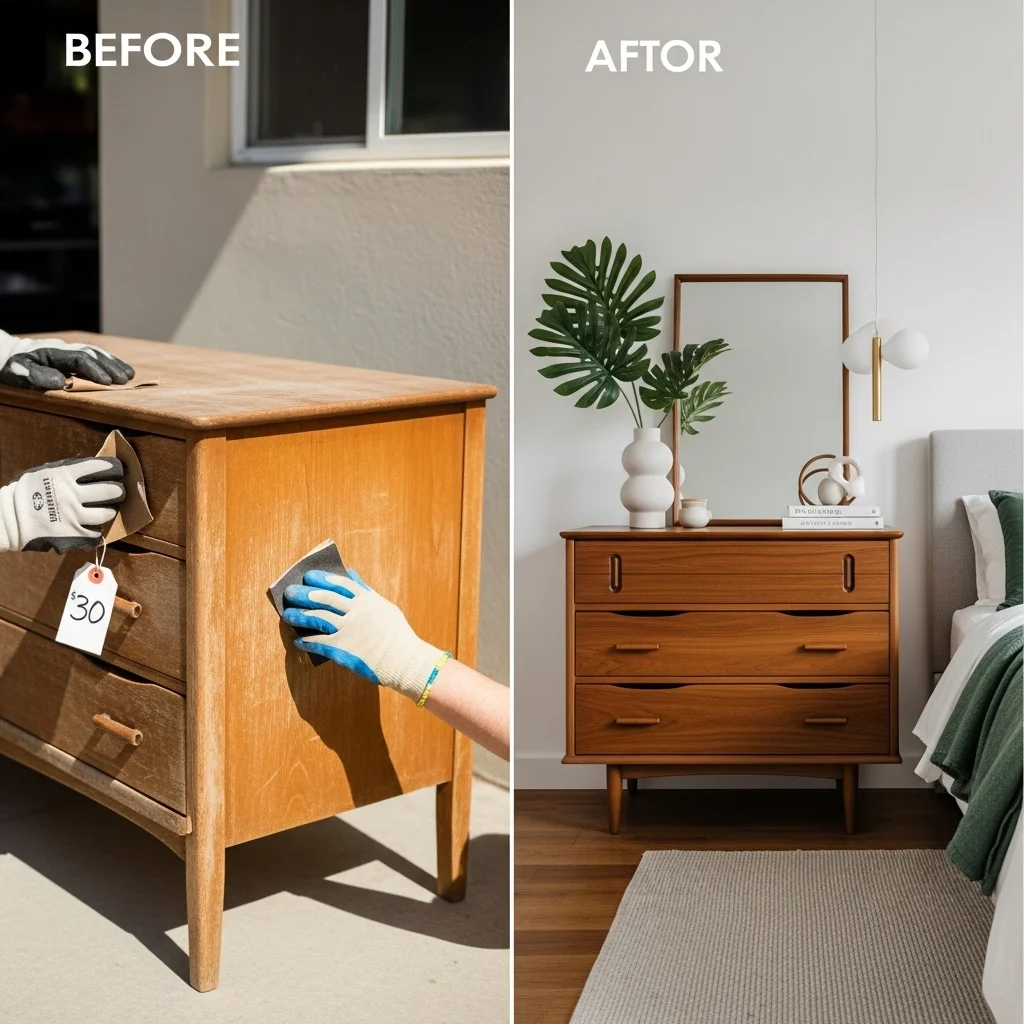
Success: The Filing Cabinet Nightstand
I mentioned this earlier a two-drawer metal filing cabinet, spray painted in a deep navy blue, with a wood top added. The drawers are perfect for bedside storage, and the industrial look balances some softer elements in the room.
The trick with metal furniture is proper surface prep. I cleaned it with degreaser, sanded it lightly to rough up the surface, used a primer designed for metal, then multiple light coats of spray paint. The top is just a piece of wood stained to match other furniture, cut to size at the hardware store, and attached with construction adhesive.
Tools and Materials You’ll Need
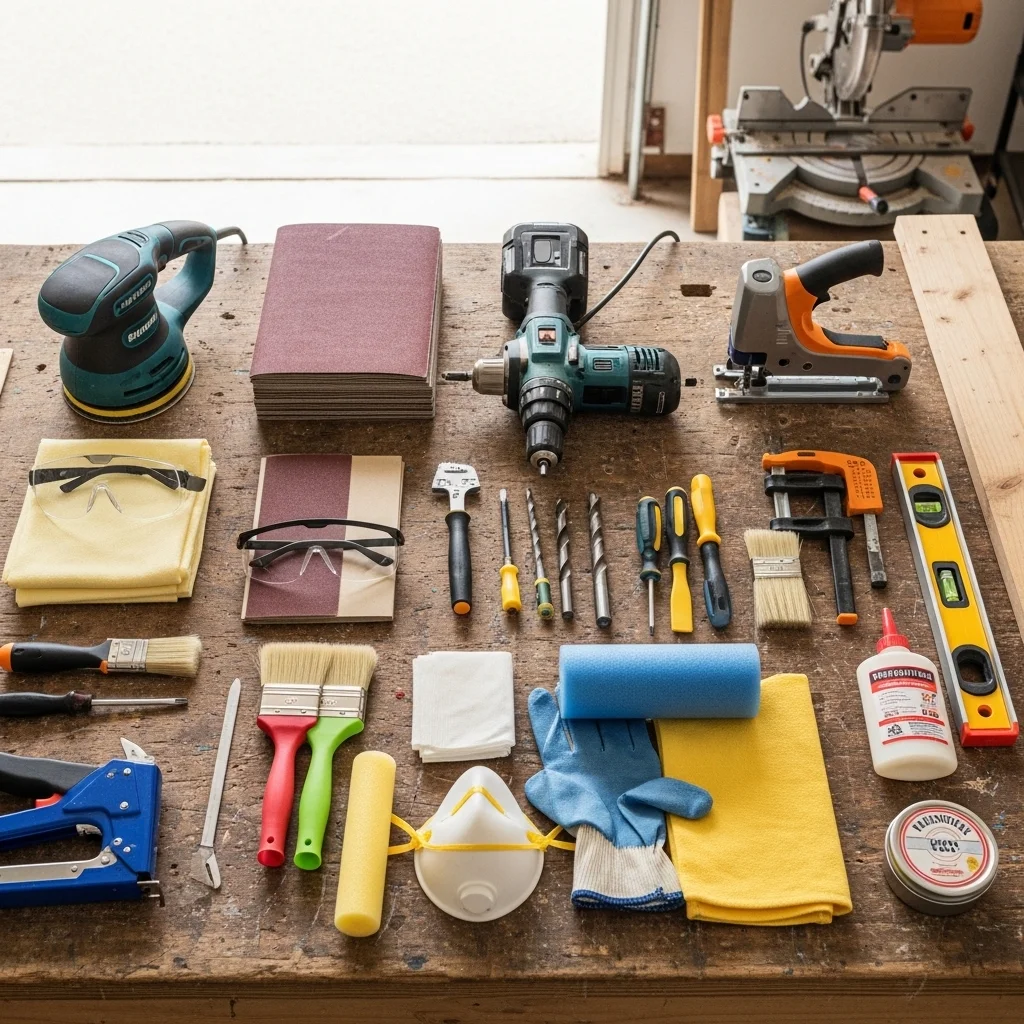
You don’t need a full workshop to start reusing furniture, but some basic tools make everything easier. Here’s what I actually use:
Essential:
- Electric sander (orbital or random orbit, around $40)
- Sandpaper in various grits
- Screwdrivers and a cordless drill
- Paintbrushes and/or foam rollers
- Drop cloths or newspaper
- Cleaning supplies (TSP, rags, degreaser)
- Safety gear (dust mask, gloves, eye protection)
Very Useful:
- Staple gun for upholstery
- Jigsaw for cutting
- Wood glue and clamps
- Level and measuring tape
- Furniture wax or paste for finishing touches
Nice to Have:
- Circular saw or miter saw for precise cuts
- Heat gun for removing paint
- Palm sander for detail work
- Furniture felt pads, casters, or other hardware
I’ve acquired these tools gradually, not all at once. Start with the essentials, do a few projects, then invest in more specialized equipment if you’re enjoying the process.
As for workspace, I use my garage, but I’ve done projects on apartment balconies, driveways, and once in a basement with questionable ventilation (do not recommend the last one). Good ventilation matters, especially with chemical strippers, spray paint, or oil-based finishes. If you’re working inside, open windows and use fans.
Finding Furniture Worth Saving
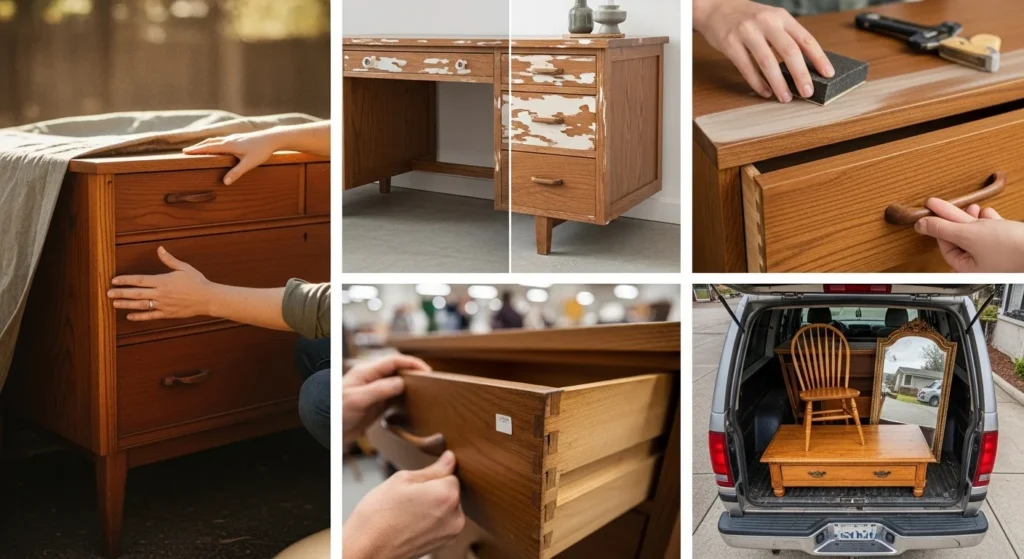
The hunt is part of the fun, honestly. I check estate sales, thrift stores, Craigslist, Facebook Marketplace, and sometimes just curbs on trash day.
Estate sales often have the best quality because you’re finding furniture from homes where people owned solid pieces and kept them for decades. Get there early for the best selection, but also try going on the last day when prices drop dramatically. I’ve nabbed incredible deals on final-day Sunday afternoons.
Thrift stores are hit-or-miss. Goodwill can be overpriced for what you get, but smaller independent shops often have better prices and more interesting pieces. Build relationships with staff sometimes they’ll let you know when good furniture is coming out.
Facebook Marketplace has exploded in recent years. People give away solid furniture constantly because they don’t want to move it. I’ve gotten beautiful pieces for free just by showing up with a truck. The downside is competition can be fierce, and you need to respond fast.
Look beyond surface issues. Scratches, dated hardware, ugly paint colors all easily fixed. Focus on structure. Wiggle the piece. Open and close drawers. Look for solid wood, dovetail joints, and sturdy construction. Avoid particleboard and MDF unless it’s truly exceptional or free, because they don’t sand well and fall apart when exposed to moisture.
Design Considerations and Current Trends
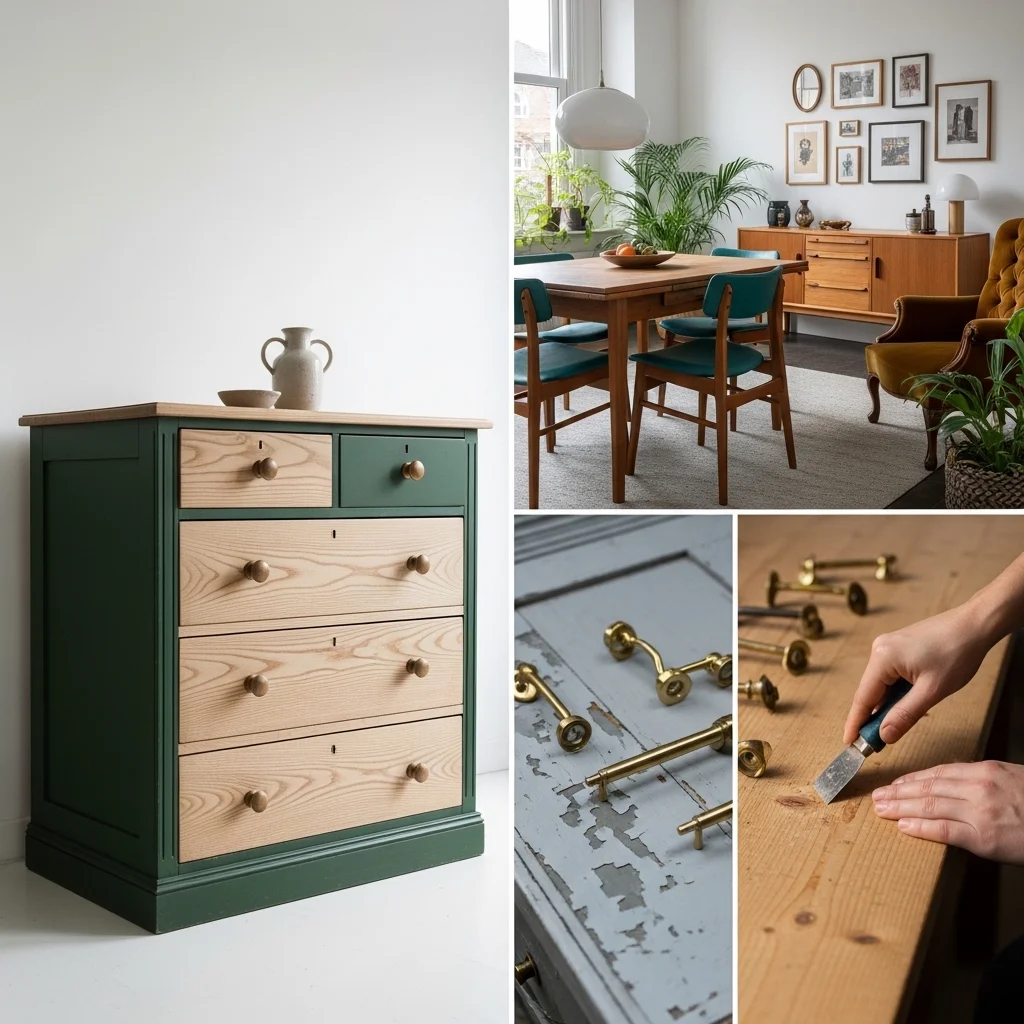
Here’s something I wish I’d understood earlier: not every piece needs to be a statement. When I started, I wanted each item to be bold and dramatic. The result was visual chaos.
Now I think about balance. Maybe one room has a brightly painted vintage dresser as a focal point, while other furniture is more subdued. Mixing styles can work beautifully, mid-century modern chairs with a farmhouse table, industrial shelving in a traditional space but it requires restraint.
Current trends lean toward:
Natural wood tones: After years of everything being painted white or gray, there’s renewed appreciation for wood grain. Lighter woods, especially oak, maple, and pine that were considered dated a decade ago are popular again.
Two-tone finishes: Painting the body of a dresser while leaving the top natural wood, or painting everything except drawer fronts. This gives you color while preserving some wood character.
Maximalism: The stark minimalism of the 2010s is giving way to more personality. Vintage furniture fits perfectly into this trend because it brings history and uniqueness.
Sustainability narratives: People want to know the story behind their furniture. Reused pieces have built-in stories that new furniture doesn’t.
Bold hardware: Replacing basic knobs and pulls with interesting hardware transforms a piece quickly and easily. This is often my first and sometimes only update to furniture.
That said, chase trends carefully. What’s hot now will eventually feel dated. I try to honor the original style of the furniture while making it work for my space, rather than forcing every piece to conform to whatever’s currently popular.
Common Mistakes and How to Avoid Them
I’ve made most of these errors personally, so please learn from my expensive or time-consuming lessons:
Skipping the cleaning step: Paint and stain adhere poorly to dirty, greasy furniture. Always clean first, even if it looks clean. Years of accumulated oils and grime are invisible but will cause adhesion problems.
Using too little paint or stain: Running out mid-project is frustrating, and getting an exact color match later is nearly impossible. Buy more than you think you need. You can always use leftovers for future projects or touch-ups.
Not testing finishes: Always test paint colors, stains, and techniques on inconspicuous areas or scrap wood first. What looks perfect in your head might look wrong in reality.
Rushing dry times: I know, waiting is hard. But painting a second coat before the first is fully dry, or using furniture before finish has cured, leads to sticky, damaged results. Follow product instructions, and when in doubt, wait longer.
Ignoring safety: Sanding creates dust that you shouldn’t breathe. Chemical strippers burn skin. Spray paint fumes are genuinely harmful. Wear protection, work in ventilated areas, and take this seriously. Your health matters more than finishing a project quickly.
Over-distressing: It’s easy to go too far with sandpaper when creating a distressed look. Start subtle you can always distress more, but you can’t un-distress.
Choosing the wrong piece: Some furniture genuinely isn’t worth the effort. If it’s wobbly, poorly constructed, or made of materials that won’t take finish well, no amount of work will transform it into something great. Be selective.
When to DIY and When to Call Professionals

I’m a big proponent of DIY, but some tasks genuinely require professional skills or equipment.
I do my own painting, basic upholstery, hardware replacement, simple repairs, staining, and straightforward carpentry. These are learnable skills that don’t require years of training.
I call professionals for:
- Complex upholstery with springs or tufting
- Structural repairs requiring specialized joinery
- Refinishing valuable antiques (where mistakes are costly)
- Electrical work if converting furniture into lamps or lighting
- Heavy pieces requiring moving help
There’s no shame in recognizing your limits. I tried to repair a wobbly table once by regluing joints, but I didn’t properly clean out the old glue first or clamp it correctly. A furniture repair shop fixed my fix for $60 and did it properly. Would have been cheaper to just hire them initially.
The Sustainability and Ethics Angle
I mentioned environmental benefits earlier, but it’s worth expanding on this because I think it’s genuinely important, even though it can sound preachy.
The furniture industry has serious environmental impacts deforestation, chemical finishes, transportation emissions, and the landfill waste when pieces are discarded. Fast furniture, designed to be cheap and temporary, has made this worse. We’re conditioned to view furniture as disposable in a way previous generations weren’t.
Reusing furniture pushes back against this. It’s not going to solve climate change single-handedly, but it’s one piece of living more sustainably. And unlike some eco-friendly choices that require sacrifice, this one often saves money and results in better-quality, more interesting furniture.
That said, there are ethical considerations. Some vintage furniture contains lead paint, especially pieces from before 1978. If you’re working with very old painted furniture, get it tested, especially if you have children. Stripping or sanding lead paint creates toxic dust.
Also, consider the source of your furniture. Estate sales from hoarder situations might involve taking advantage of difficult circumstances. I try to pay fair prices and be respectful, even when hunting bargains.
Making It Personal
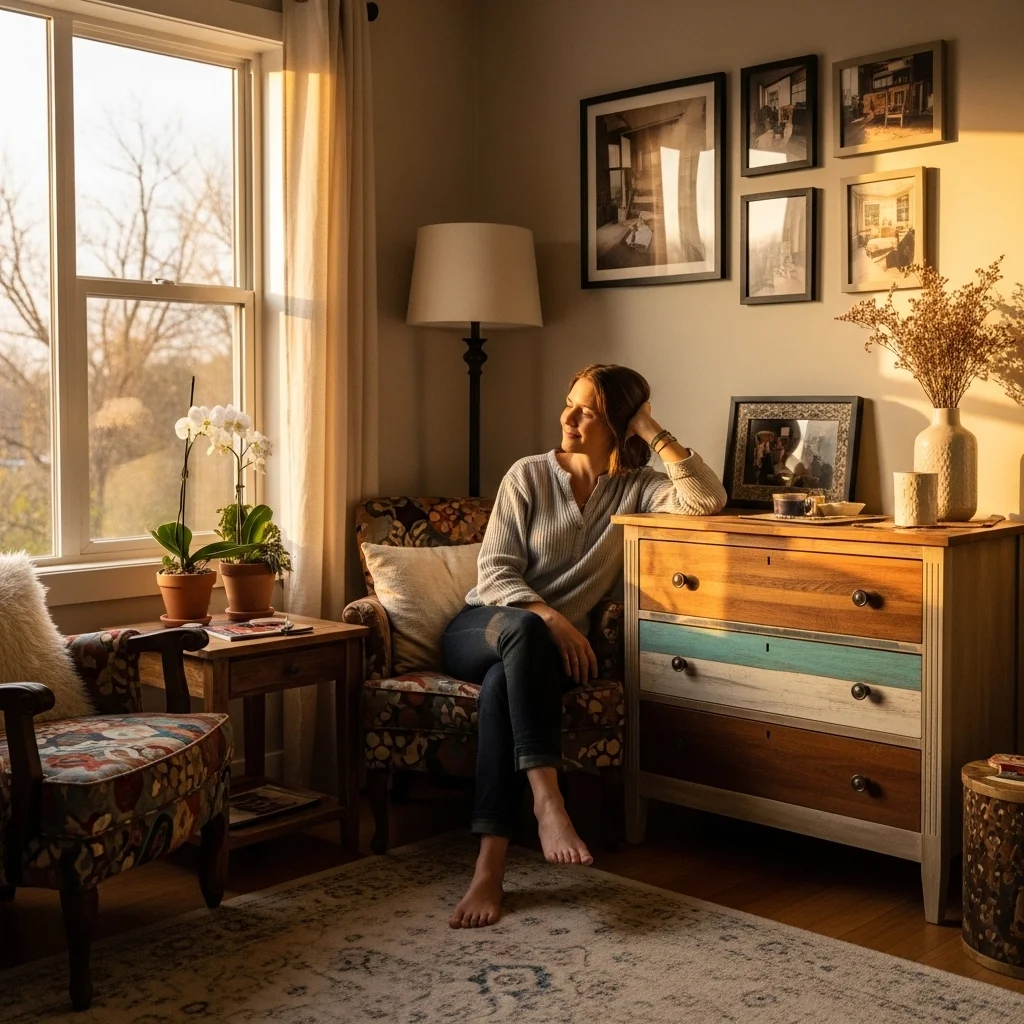
What makes reused furniture special isn’t just sustainability or cost savings it’s personality. My home is full of pieces with stories. The dresser from my grandmother. The table I found on the curb and refinished in my first apartment. The chairs I reupholstered when I was seven months pregnant and nesting hard.
New furniture from big-box stores is fine. I own some too. But it doesn’t have that connection. It’s interchangeable, forgettable.
When you choose a piece of old furniture, bring it home, spend hours working on it, and find the perfect spot, you’re creating something that’s yours in a way that buying new can never replicate. That dresser isn’t just a dresser it’s the weekend you spent learning to use wood filler, the three trips to the hardware store because you kept getting the wrong primer, the moment you stepped back and realized you’d actually made something beautiful.
Getting Started: Your First Project

If you’re new to this, start small. Don’t tackle a full dining set or complex upholstery for your first attempt.
Good beginner projects:
- Small side table or nightstand (paint or stain)
- Dining chair reupholstery (just the seat, not full chair)
- Dresser refinish (simple update, not complex restoration)
- Wooden tray or small shelf (practice finishing techniques)
Pick something where mistakes won’t be devastating, either because the piece didn’t cost much or because its purpose is forgiving. That first nightstand I mentioned, the spray paint disaster? I eventually stripped it, sanded it properly, used actual furniture paint, and it turned out fine. But if it had been an expensive or sentimental piece, that learning curve would have been painful.
Expect your first project to take longer than anticipated and probably not turn out exactly as imagined. That’s normal. The second project will go faster. By the fifth, you’ll have developed skills and intuition that make everything easier.
Final Thoughts
Reusing old furniture isn’t always easier than buying new. It’s sometimes messy, frequently frustrating, and occasionally makes you wonder why you didn’t just go to IKEA.
But there’s real satisfaction in taking something worn or discarded and making it functional and beautiful again. In developing skills that make you more capable and less dependent on buying solutions to every problem. In filling your home with pieces that have character and history rather than the same mass-produced items everyone else owns.
You don’t need to be particularly crafty or artistic. You need patience, willingness to learn, and realistic expectations. The internet is full of perfect transformations that hide the hours of work and multiple attempts. Real projects are messier, but they’re also more rewarding precisely because they’re challenging.
Start with one piece. Something small, inexpensive, and forgiving. See how it goes. Maybe you’ll discover this isn’t for you, and that’s fine. Or maybe you’ll find, like I did, that there’s genuine joy in bringing old furniture back to life, and that the hunt for the next project becomes a ongoing hobby that fills your home with pieces you’re actually proud of.
That grandmother’s dresser I mentioned at the beginning, the spray paint disaster? It’s in my guest room now, properly refinished after I learned what I was doing. Every time I see it, I remember how far I’ve come, from someone who didn’t know the difference between primer and paint to someone who can look at a beat-up piece of furniture and see its potential.
You can get there too. Just remember: start small, be patient with yourself, and don’t be afraid to make mistakes. They’re part of the process, and sometimes, they make the best stories.