
I’ll be honest with you, my journey into making handmade home decor started because I was broke and tired of looking at bare walls. What began as a budget-friendly solution turned into something I genuinely love doing. Over the years, I’ve filled my home (and several friends’ homes) with pieces that cost a fraction of store prices and actually mean something.
The beauty of creating your own decor isn’t just about saving money, though that’s definitely a perk. It’s about having something unique that reflects your actual personality, not what a corporate buyer thought would appeal to the masses. Plus, there’s something deeply satisfying about pointing to something in your home and saying, “Yeah, I made that.”
Let me walk you through some projects I’ve tackled, along with the real talk about what works, what doesn’t, and what you actually need to get started.
Starting With the Right Mindset (and Materials)
Before diving into specific projects, let’s address something important: you don’t need a fully stocked craft room to make beautiful home decor. I started on my kitchen table with supplies from the dollar store and thrift shops. Even now, some of my favorite pieces came from the most basic materials.
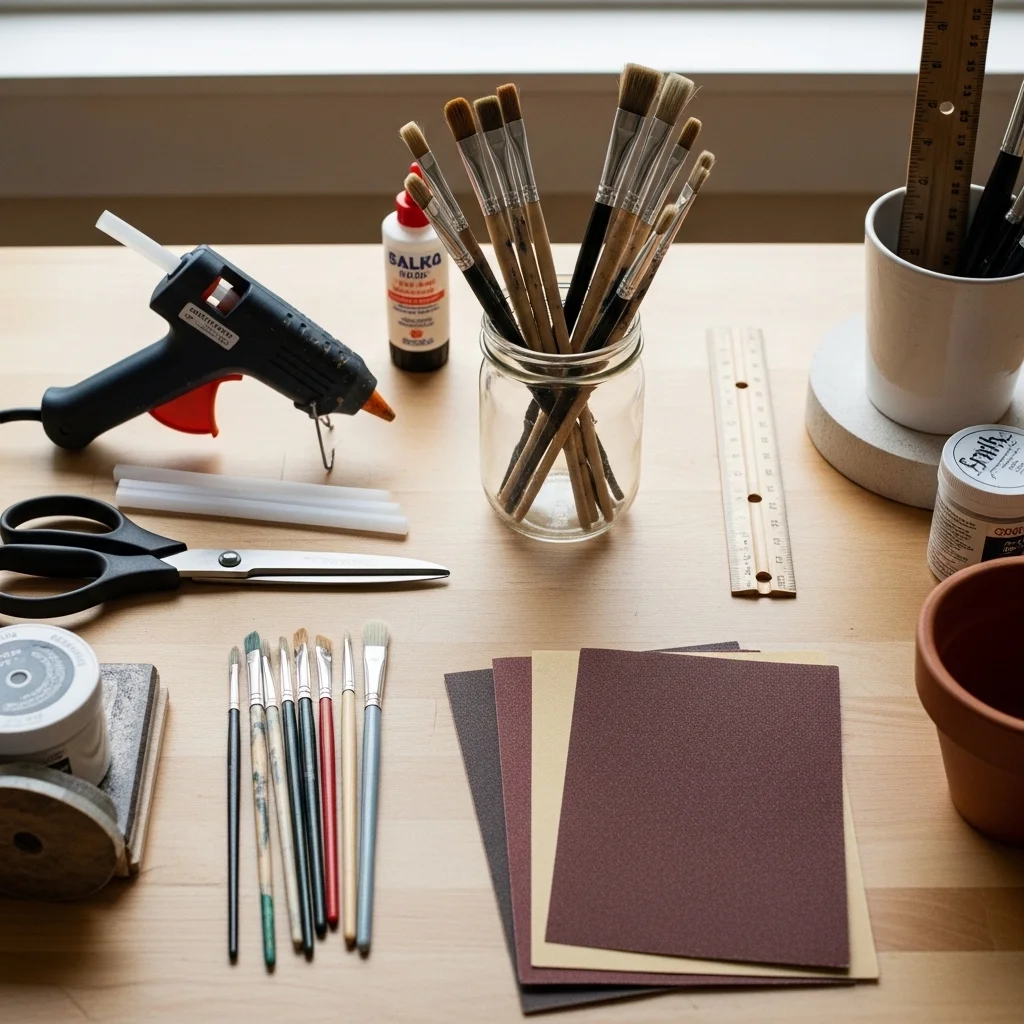
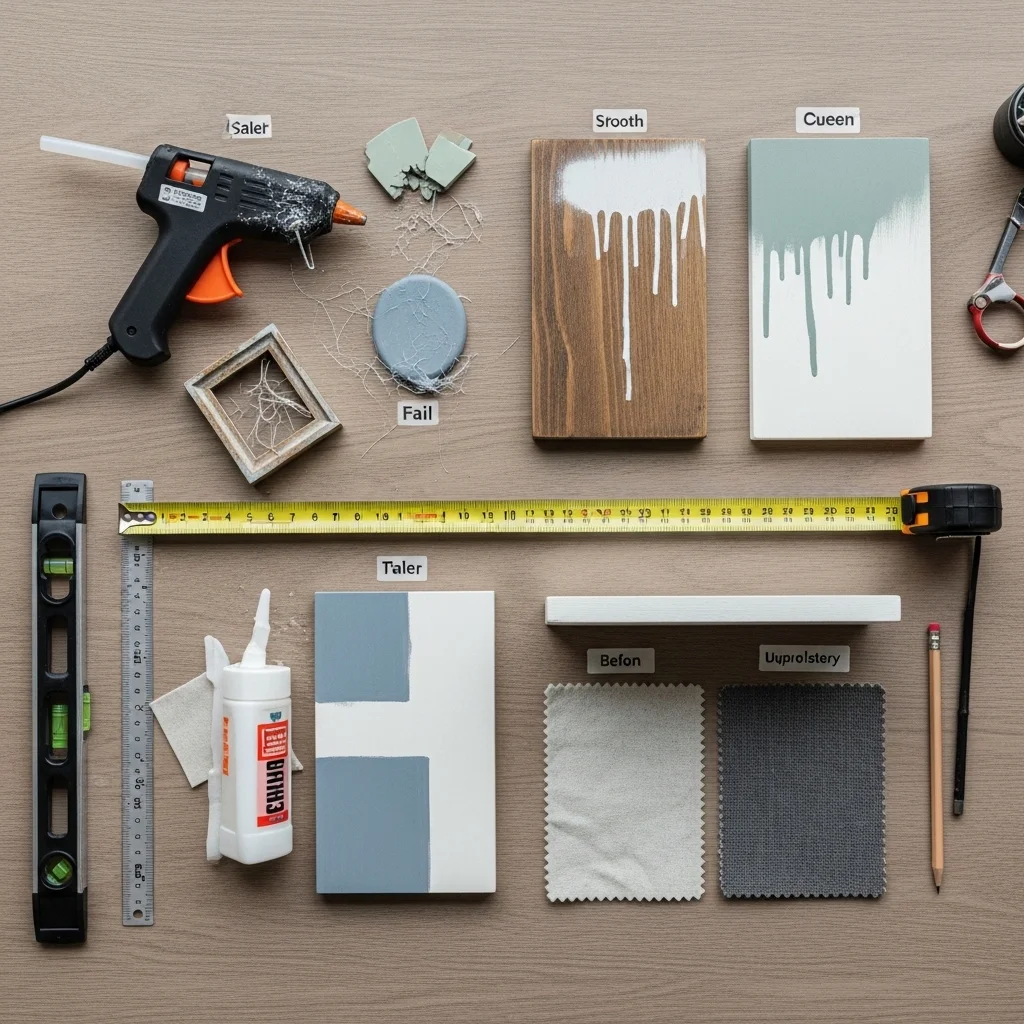
That said, investing in a few quality basics will save you frustration. A good hot glue gun (not the $3 one that burns out in a month), sharp scissors, a reliable paintbrush set, and some sandpaper in various grits will serve you across dozens of projects. I learned this the hard way after ruining what should have been a simple project with a glue gun that heated unevenly.
Wall Art That Actually Looks Intentional
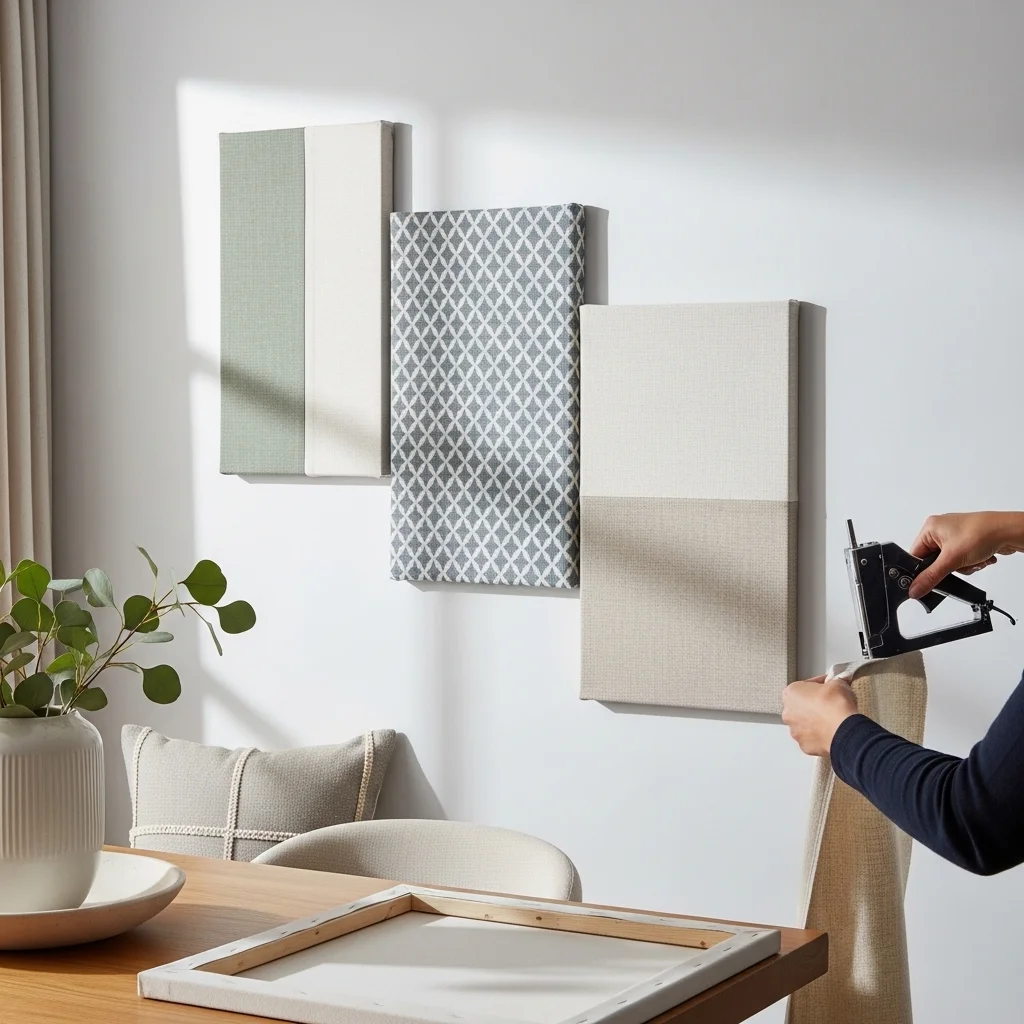
The Fabric Panel Project
One of my go-to projects when I want to make a big visual impact is fabric-wrapped canvas panels. These look incredibly expensive but cost maybe $15-20 for a set of three.
Here’s what you need: canvas stretcher frames (the wooden frames artists use), batting or thin foam, your choice of fabric, and a staple gun. The process is straightforward: stretch your fabric over the frame, wrap it around the back, and staple it in place. But the devil’s in the details.;The mistake I made on my first attempt was not ironing the fabric first. I ended up with wrinkles immortalized under staples. Now I always iron, and I pull the fabric taut as I work, starting from the center of each side and working toward the corners. For the corners, fold them like you’re wrapping a present, it creates clean, flat edges.
I’ve made these in my dining room using a bold geometric fabric, and they’ve held up for three years without sagging. The trick is using upholstery-weight fabric or at least a medium-weight cotton. Those thin quilting cottons just don’t have enough body.
Abstract Canvas Painting (Yes, You Can Do This)
I used to think abstract art was beyond me because I can barely draw a stick figure. But abstract decor is wonderfully forgiving because there’s no “right” way to do it.
My favorite technique involves texture paste, acrylic paints, and a palette knife. I spread the texture paste across a canvas in sweeping motions, let it dry completely (this takes longer than you think give it at least 24 hours), then paint over it with watered-down acrylics. The paste creates dimension that catches light differently throughout the day.
The color palette matters more than artistic skill here. I stick to three or four colors maximum, usually pulling from colors already in the room. For my living room, I used cream, sage green, dusty blue, and just a touch of gold. It ties together my throw pillows, rug, and curtains without being matchy-matchy.
A 16×20 canvas with supplies costs about $25, while a similar piece at HomeGoods would easily run $80-100. And honestly? Mine looks better because it’s the exact colors I needed.
Functional Decor That Earns Its Space
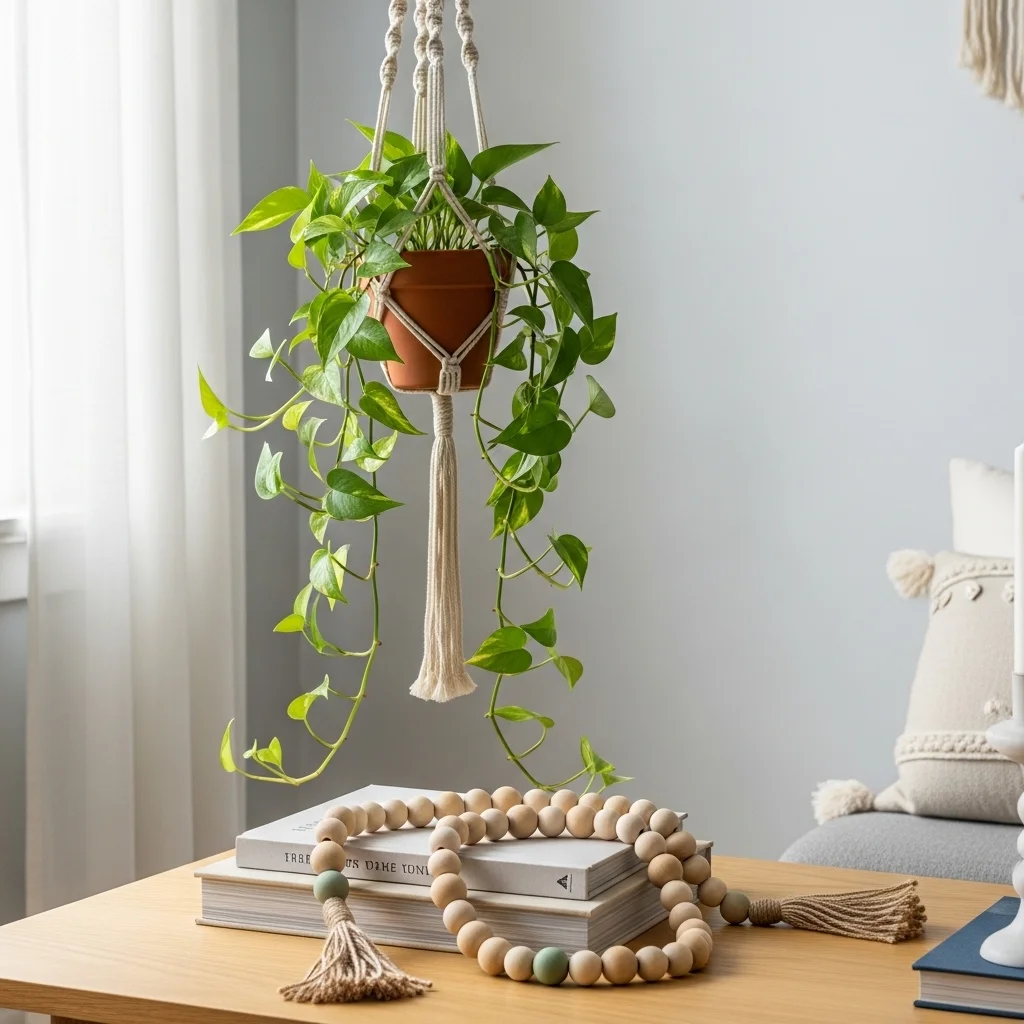
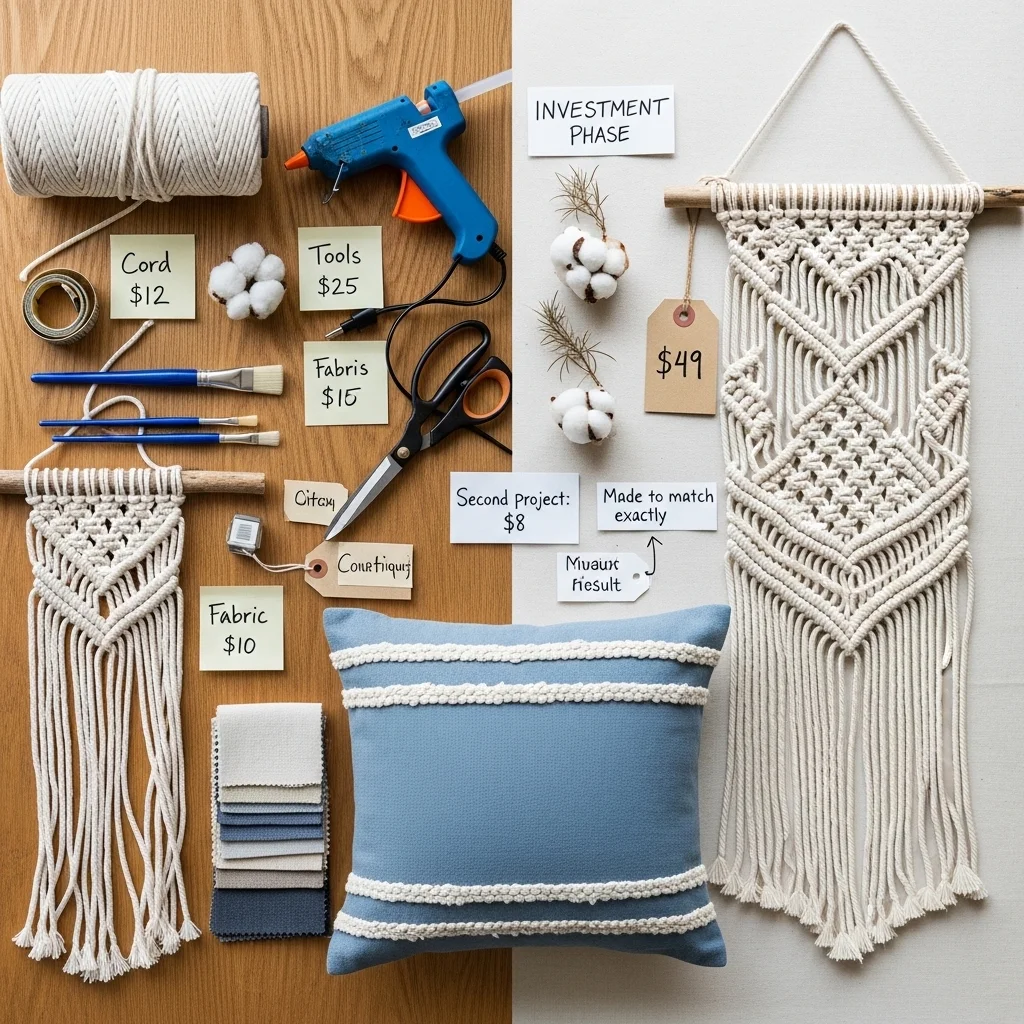
Macrame Plant Hangers
Macramé had this moment about five years ago, and while the trend has cooled, I still love it especially for plant hangers. They solve the problem of surface space while adding vertical interest.
You need macramé cord (I prefer 4mm three-strand cotton), a metal or wooden ring, scissors, and patience. The basic square knot pattern is genuinely simple once you get the rhythm. I taught myself using YouTube videos during a weekend, and my first hanger was definitely lopsided, but it still held my pothos plant just fine.
The learning curve isn’t steep, but your hands will get tired. I usually work in 30-minute sessions rather than powering through. Also, measure your cord longer than you think you need. Running short when you’re nearly done is infuriating I know this from experience.
A handmade plant hanger uses about 100 feet of cord (which costs $8-12) and takes 2-3 hours for a beginner. That same hanger in a boutique? $35-50 easily.
Wooden Bead Garland
These Scandinavian-inspired garlands have been everywhere lately, draped over coffee table books or winding through centerpieces. They’re almost suspiciously easy to make.
Buy natural wooden beads in varying sizes (I like mixing 20mm and 30mm), some jute twine or leather cord, and you’re set. String them in a pattern you like I alternate sizes and occasionally add in a painted bead for interest. Tie knots on either end, and you’re done.
What makes these look expensive rather than crafty is using quality wooden beads. The cheap ones from big box craft stores often have rough holes that snag the cord. I order mine from small Etsy suppliers, and the difference is noticeable. They’re smooth, consistently sized, and have a nicer weight to them.
I made a six-foot garland for my coffee table in about 20 minutes while watching TV. It cost $10 and gets more compliments than almost anything else in my living room.
Textile Projects That Add Warmth

Custom Throw Pillows
If you can sew a straight line, you can make throw pillows. Even if you can’t sew, you can still make no-sew versions with fabric glue or iron-on hem tape.
I make envelope-back pillow covers because they’re washable and let me swap inserts seasonally. Cut two rectangles for the back that overlap, and one for the front. Sew them together inside-out, flip right-side-out, and stuff with a pillow insert.
The real secret to professional-looking pillows is using the right insert size. If you make an 18×18 cover, use a 20×20 insert. That little bit of overstuffing gives you that plump, full look instead of a sad, deflated pillow.
I’ve made dozens of these at this point. My favorites are the ones using vintage tea towels I found at an estate sale they have this incredible weight and texture you can’t get from new fabric. Each cover costs me maybe $8 in materials (less if I’m using thrifted fabric), compared to $30-60 for designer pillow covers.
Woven Wall Hanging
Weaving intimidates people, but you can make a simple wall hanging without a loom. I’ve created several using just a stick from my yard, some yarn, and a basic weaving comb (or honestly, just a fork works fine).
Find a sturdy branch, cut your warp threads (the vertical threads) and tie them to the stick with enough length to reach your desired finished length plus several extra inches. Then weave your weft threads (the horizontal ones) through, alternating over and under.
The beauty here is in mixing textures. I combine chunky wool yarn, thin cotton thread, ribbon scraps, and even strips of fabric. The variation creates visual interest even with a simple over-under weave pattern.
; itMy first wall hanging took about four hours and cost around $20 in yarn. It’s hanging in my bedroom and has this organic, bohemian vibe that softens the space. The wonkiness of my early weaving actually adds to its handmade charm; it would look mass-produced.
Upcycling Projects That Give New Life to Old Things
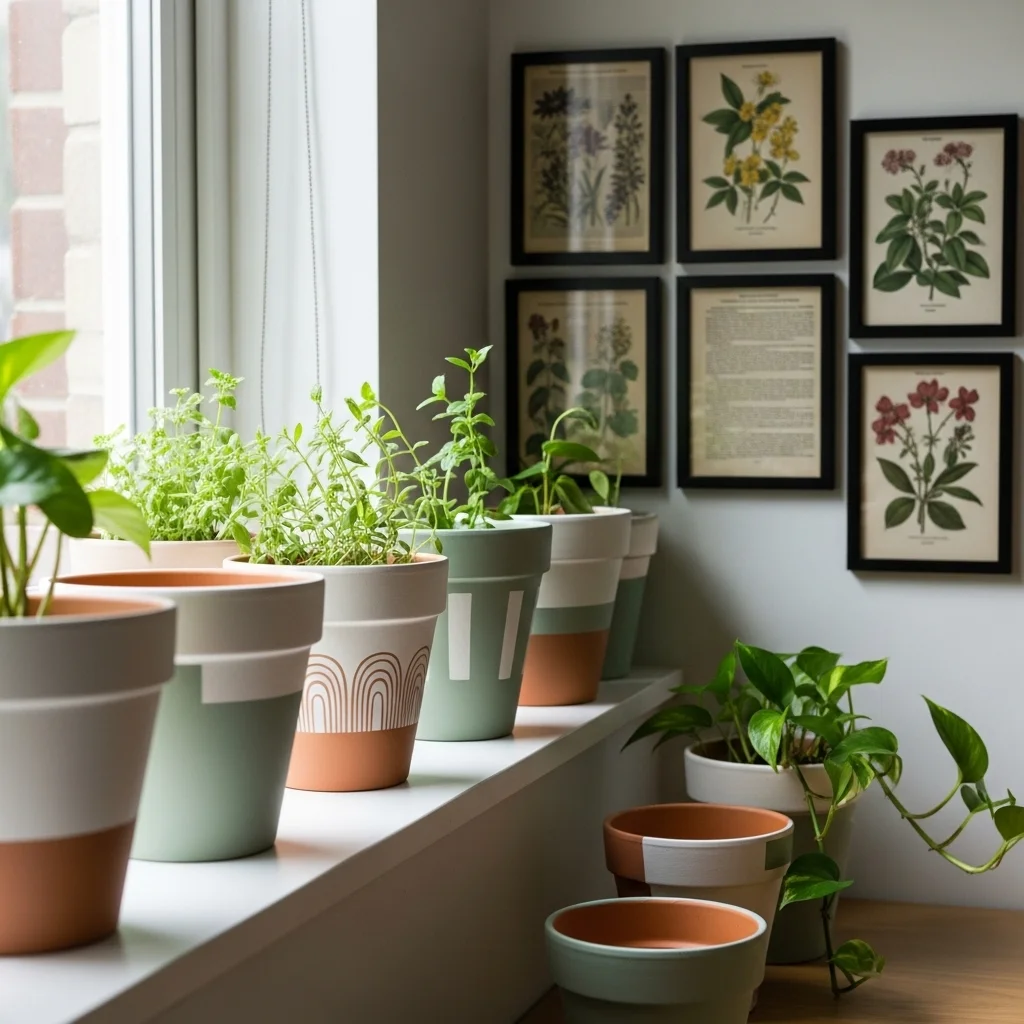
Painted Terra Cotta Pots
This is almost too simple to include, but painted terra cotta pots have transformed my plant game. Those basic orange pots from the hardware store are dirt cheap, I’m talking $2-3 each, but they’re not exactly stylish.
I paint mine with acrylic craft paint in matte finishes, sometimes adding patterns with painter’s tape. A coat of matte sealer keeps them from chipping (learned that lesson after my first attempts flaked within weeks).
My kitchen windowsill has a collection of pots I painted in various shades of cream, sage, and soft terracotta. They’re all slightly different, which makes them look curated rather than matchy. The whole collection of seven pots cost me maybe $25 including paint, and they look like something from a plant boutique.
Book Page Art
I have mixed feelings about deconstructing books, but if you find damaged books at thrift stores that are already falling apart, the pages can become really lovely art. I avoid anything rare or valuable we’re talking Reader’s Digest condensed books and old encyclopedias that nobody wants.
Frame a particularly beautiful page with interesting typography or illustrations. Create a collage. Use pages to cover inexpensive frames in decoupage. I made a whole gallery wall in my office using vintage book pages with botanical illustrations, each in a simple black frame.
The key is selecting pages thoughtfully. Not every page works. I look for interesting fonts, illustrations, margin notes, or aged paper with character. A spritz of hairspray before framing helps prevent the paper from yellowing further.
Working With Natural Materials
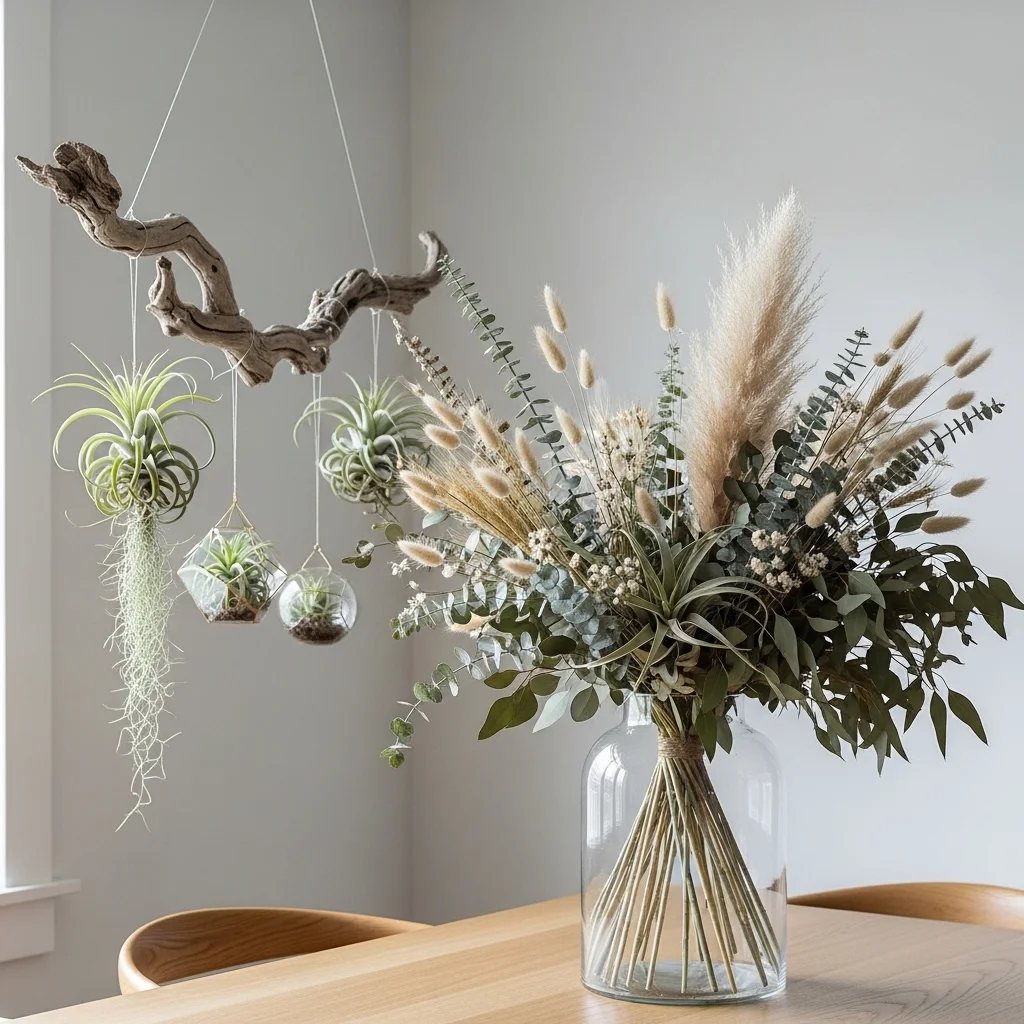
Dried Flower Arrangements
Fresh flowers die; dried flowers are forever. Or at least for many months. I dry my own flowers by hanging them upside down in my closet, but you can also buy pre-dried stems.
Eucalyptus, statice, baby’s breath, and strawflower all dry beautifully. Roses work if you catch them at the right stage. I learned that fully opened roses just drop their petals, but roses cut when they’re about three-quarters open hold together better.
I keep a large glass vase on my dining table with an arrangement of dried eucalyptus, pampas grass, and bunny tail grass. It’s been there for eight months and still looks good. The initial investment was about $30 for stems, but that’s eight months of daily enjoyment versus $15 weekly for fresh flowers that last five days.
Driftwood and Branch Decor
Living near water gives me access to driftwood, but even if you’re landlocked, you can find interesting branches in parks or your own yard. A sculptural branch in a tall vase is instant art.
I clean mine thoroughly scrub with soap and water, let them dry completely, sometimes bake them at low temperature to kill any insects. This step is non-negotiable unless you want bugs in your house.
One of my favorite pieces is a gnarled branch I suspended horizontally from the ceiling with fishing line. I hang air plants and small terrariums from it. The whole setup cost maybe $15 for the air plants and containers; the branch was free. It’s become a conversation piece that defines my whole living room corner.
Lighting Projects That Set the Mood
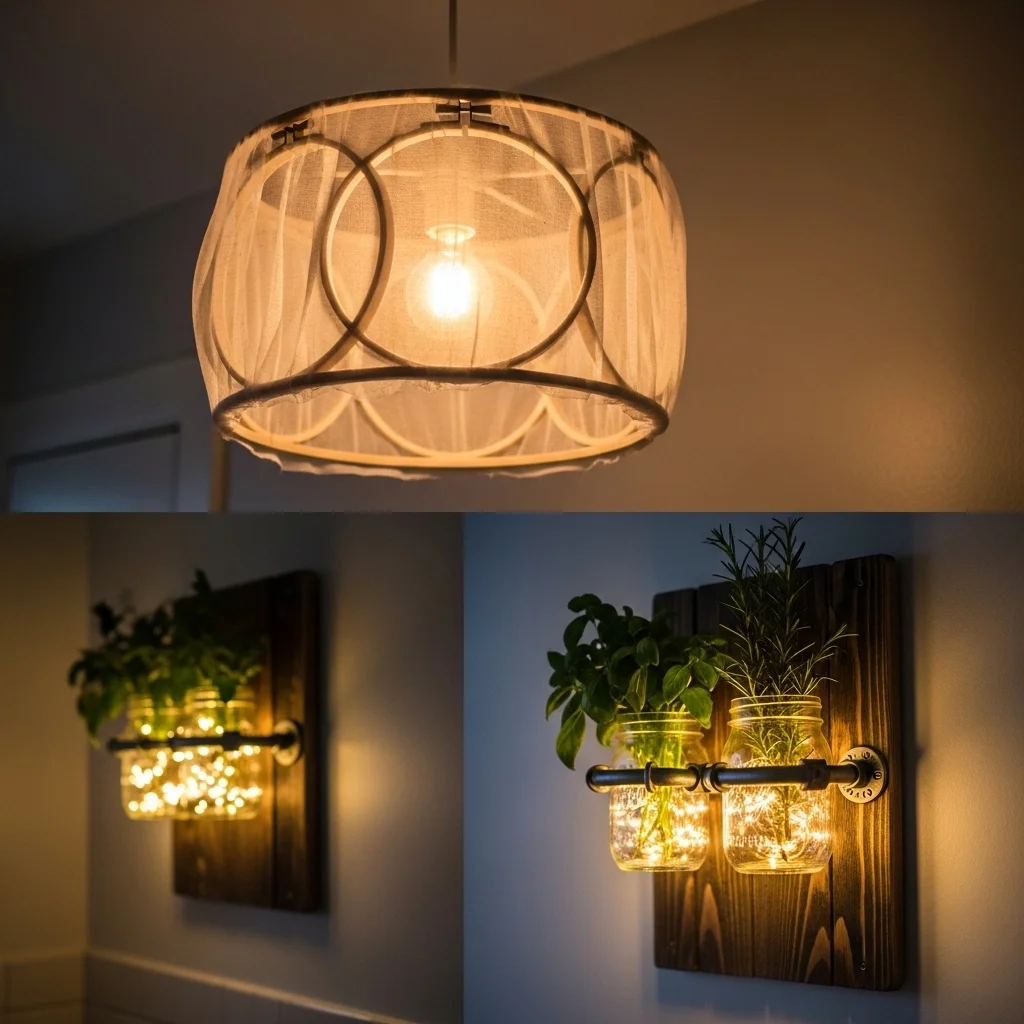
Pendant Light Makeover
I’m not going to tell you to rewire a lamp if you’ve never done electrical work that’s a recipe for disaster. But you can absolutely change the shade or covering on an existing pendant light.
I bought the cheapest pendant light kit from the hardware store (about $15) and made my own shade using embroidery hoops and sheer fabric. Wire the hoops together to create a cylindrical shape, wrap with fabric, and attach to the light fixture. It looks like a $200 West Elm pendant.
The important thing: use a low-wattage LED bulb that doesn’t generate much heat. I learned this when my first attempt with a 60-watt bulb made the fabric uncomfortably warm. A 40-watt-equivalent LED solves that problem entirely.
Mason Jar Sconces
These have become almost cliché, but I still think they’re charming in the right setting. Attach mason jar holders to wooden boards, mount them to the wall, and use them for flowers, candles, or fairy lights.
I made a pair for my bathroom using reclaimed wood from an old fence, pipe clamps that hold the jars, and some dark stain. They hold fresh herbs in my bathroom: basil, mint, and a tiny rosemary plant, and make the space smell incredible.
The wood cost nothing (salvaged), the pipe clamps were $6 each, and the jars I already had. So for $12, I have custom sconces that add both function and style. Plus, growing herbs in my bathroom has been surprisingly successful. The humidity from showers seems to make them happy.
Things I’ve Learned the Hard Way
Let me share some mistakes so you can avoid them:
Hot glue isn’t always the answer. I love my glue gun, but it doesn’t work for everything. It fails on smooth surfaces, melts certain materials, and doesn’t hold up under weight. I’ve had wall art crash to the floor because I trusted hot glue over proper mounting hardware.
Spray paint technique matters. Light coats from 8-10 inches away, letting each coat dry completely. I’ve created drip disasters by being impatient and spraying too heavily. Now I do multiple thin coats, and my finishes look professional.
Not everything needs to be “rustic.” When I first started, I distressed everything within an inch of its life. But sometimes a clean, simple finish is more sophisticated. Learn when to stop.
Measure your space first. I’ve made wall art that was too small for the space, shelves that were too wide for the wall, and centerpieces too tall to see over during dinner. Measure twice, create once.
Quality materials show. You don’t need expensive everything, but cheap fabric looks cheap, low-quality paint coverage is terrible, and flimsy wood warps. Invest a little more in the materials that define the project’s quality.
The Economics of Handmade Decor
People often assume DIY is always cheaper, but let’s be realistic. Sometimes it isn’t.
When you factor in materials, tools, and the learning curve, your first few projects might actually cost more than buying something similar. My first macramé wall hanging probably cost $40 in supplies and took six hours. Could I have bought something similar for that? Maybe.
But here’s what shifts the equation: you keep the skills and tools. That hot glue gun, those paintbrushes, the leftover fabric and paint they’re available for the next project. By my fifth macramé piece, I had the skills to work faster and the materials left over from previous projects. That one cost me maybe $8 and took two hours.
The real value comes from the ability to customize. Need a throw pillow in that exact shade of blue to match your grandmother’s quilt? Good luck finding that in stores. But you can make it for $10 in materials.
When to DIY and When to Buy
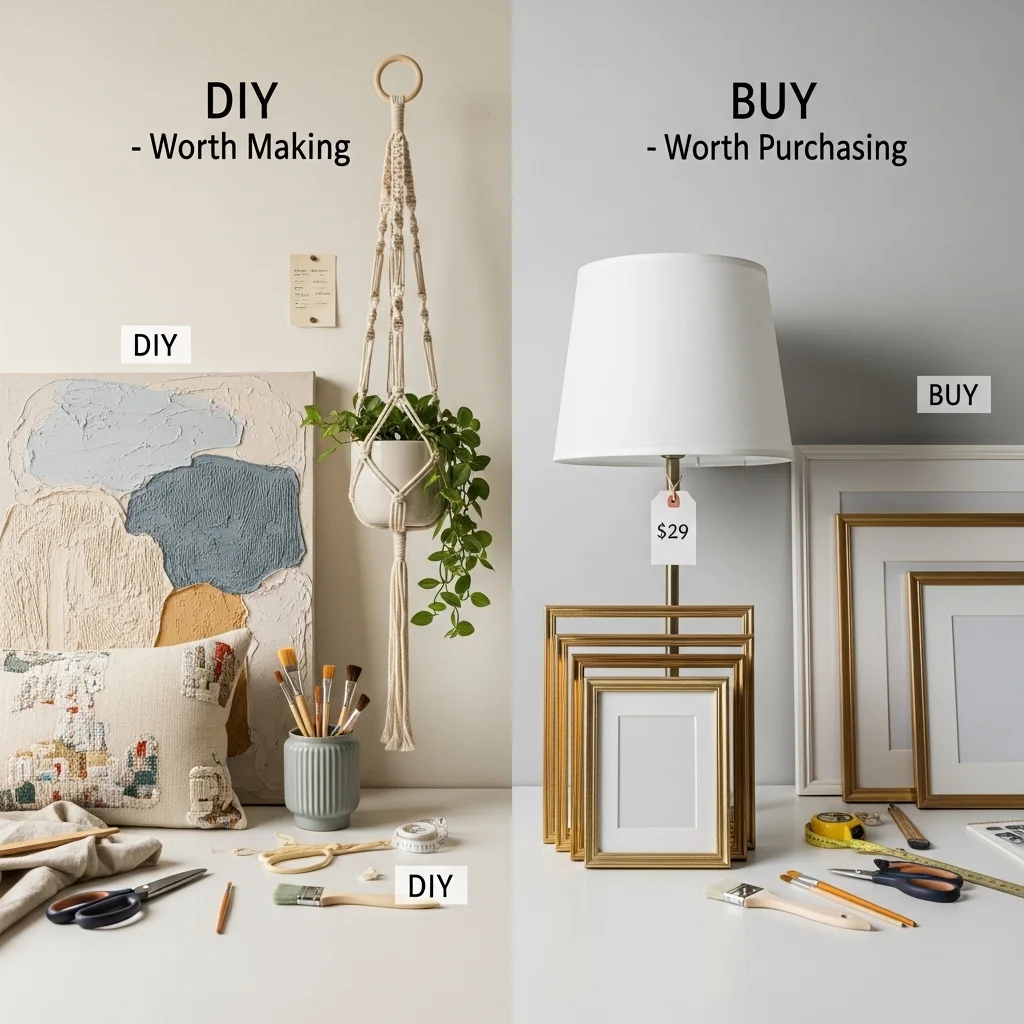
I’ve learned that my time has value too. Some things are worth making; others aren’t.
Worth making: Anything you can personalize to your exact specifications, pieces where the handmade quality adds to the appeal (like textured wall art or macramé), and projects where you’ll reuse the skills.
Probably not worth making: Things that require specialized tools you’ll use once, items where mass production actually reduces the cost dramatically (like simple picture frames), and projects far outside your skill level that will frustrate more than fulfill you.
I tried making lampshades once. Once. The specialized tools, the techniques I couldn’t quite master, the frustration not worth it. I can buy a nice lampshade for $25-30, and that’s what I do now. But throw pillows? Wall art? Planters? I’ll make those all day.
Finding Your Handmade Style
The projects I’ve shared reflect my aesthetic natural materials, neutral colors, texture-focused, slightly bohemian. Your style might be completely different.
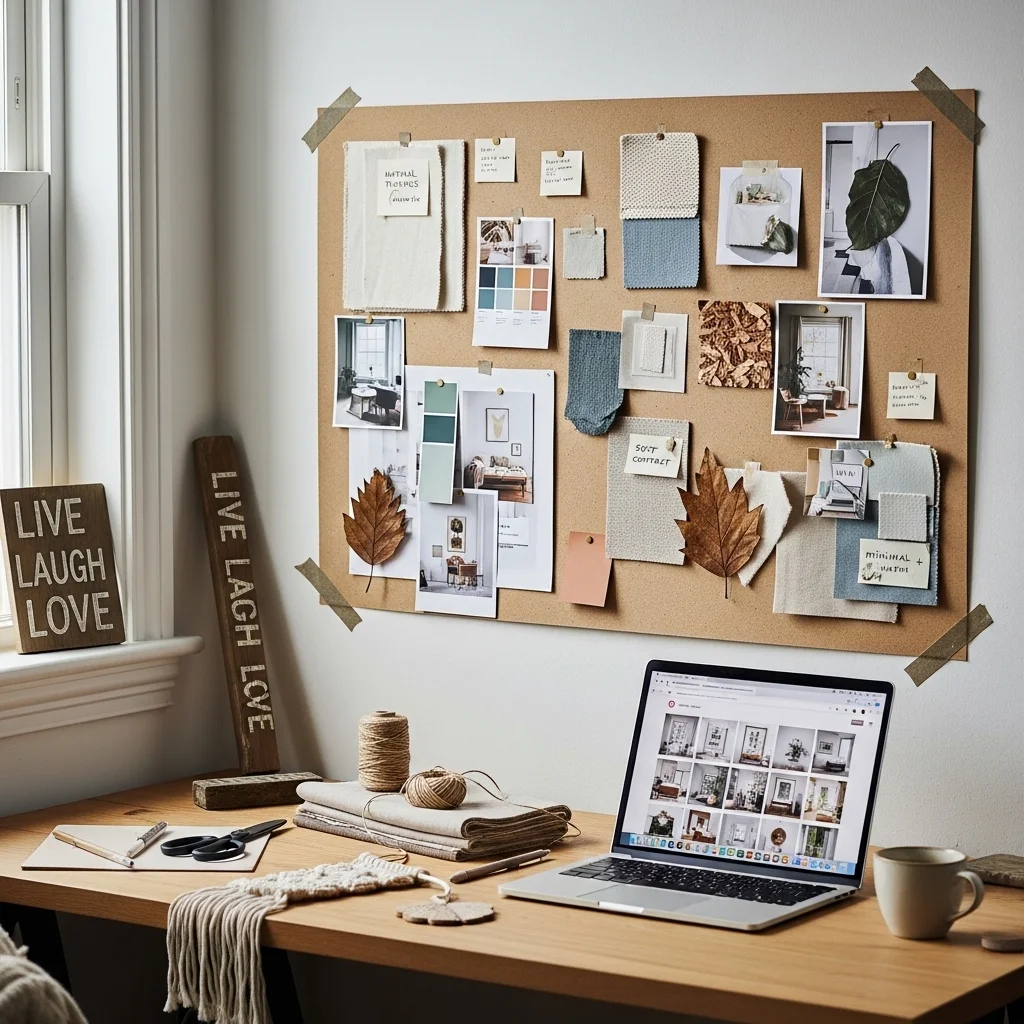
Before diving into projects, spend time figuring out what you actually like. I made the mistake early on of creating things because they were trending, not because they fit my space or style. I ended up with a “Live Laugh Love” sign that lasted exactly three days before I felt embarrassed by it.
Create a mood board digital or physical. Pin images that resonate with you. Look for patterns in colors, materials, and styles. This will guide your projects toward cohesion.
Your handmade pieces should feel like they belong together and belong in your home, even if they’re all different. The common thread might be a color palette, a material preference, or a certain level of minimalism or maximalism.
Building Skills Progressively
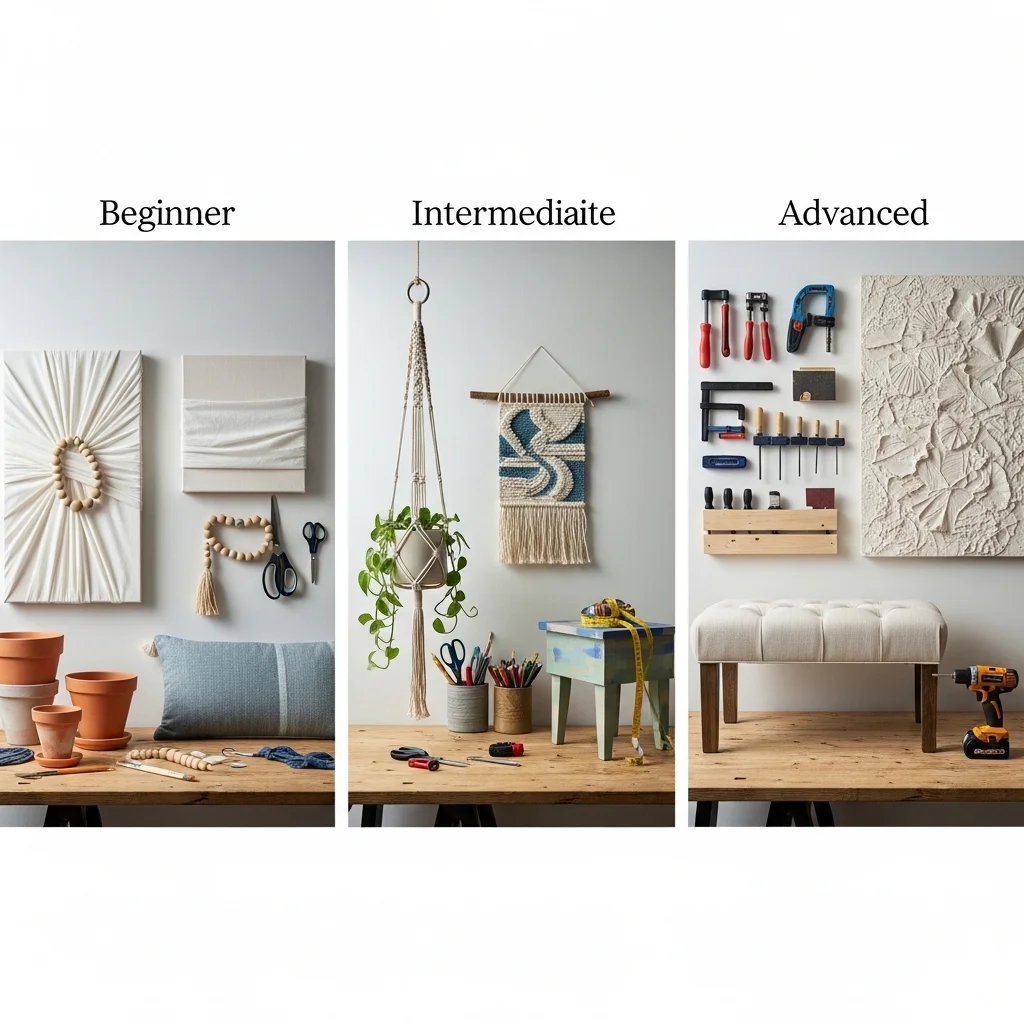
Don’t start with the most complex project. I recommend this progression:
Beginner: Painted pots, simple fabric wall art, wooden bead garland, basic throw pillow covers
Intermediate: Macramé plant hangers, woven wall hangings, furniture painting, more complex textile projects
Advanced: Upholstered furniture, large-scale wall installations, complex woodworking projects
Each level builds skills. Painting pots teaches you about paint finishes and sealers. That knowledge transfers to painting furniture. Simple sewing on pillow covers prepares you for more complex textile work.
I still remember the pride of completing my first project those fabric panels I mentioned earlier. They were imperfect, but they were mine. That feeling propelled me to the next project, and the next.
Creating a Workspace (Even If It’s Small)
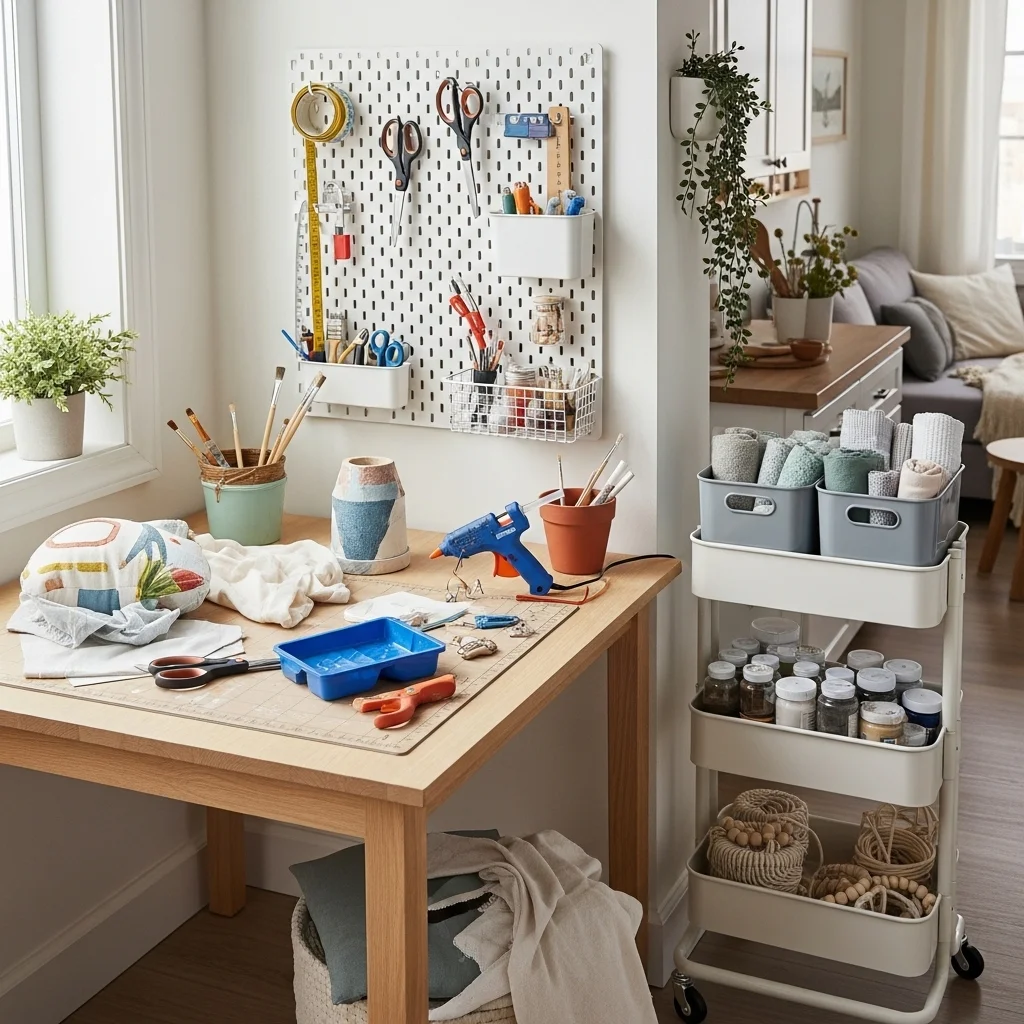
You don’t need a dedicated craft room, but you do need somewhere to work. For two years, I worked entirely on my kitchen table, storing supplies in a closet.
If you’re in a small space:
Use vertical storage. Wall-mounted pegboards hold tools visibly and accessibly.
Invest in a rolling cart. I have one from IKEA that holds current projects and frequently used supplies. It tucks beside my sofa when not in use.
Keep it contained. Use bins and boxes for supplies so you can set up and clean up efficiently.
Protect your surfaces. A cheap cutting mat or piece of cardboard prevents damage to your table.
Now I have a spare bedroom as a craft room, but honestly, some of my favorite pieces came from my kitchen table era. Space helps, but it’s not everything.
The Sustainability Angle
Making your own decor can be incredibly sustainable or not. It depends on your approach.
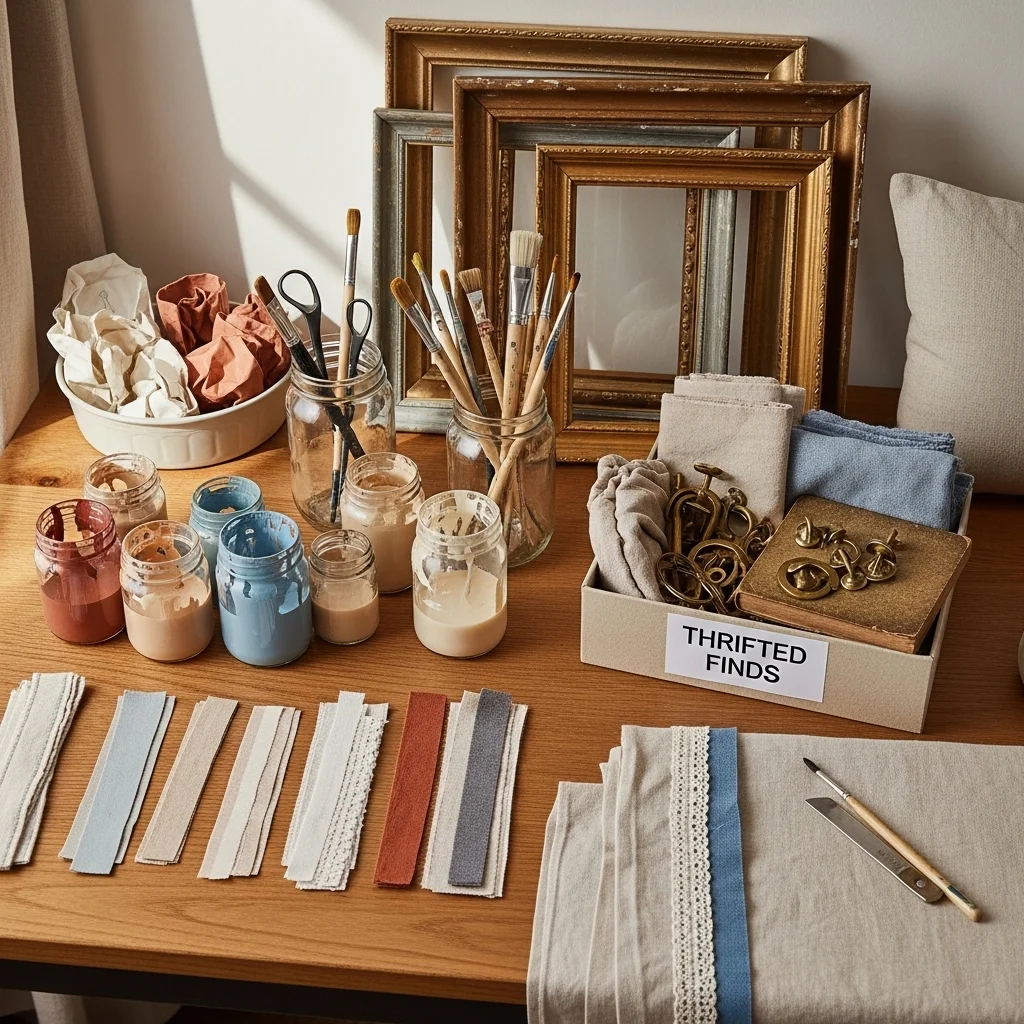
I try to shop my house first. Before buying new materials, I check what I already have. Leftover fabric from one project becomes trim for another. Paint can be mixed to create new colors. Jars and containers get repurposed constantly.
Thrift stores and estate sales are treasure troves. I’ve found beautiful fabric, frames, hardware, and materials for pennies on the dollar. Plus, using vintage materials adds character that new materials lack.
That said, I’m not perfect. I’ve definitely bought supplies for projects I never completed. I’ve thrown out failed attempts. The key is learning from those mistakes and being more intentional about what I start.
Troubleshooting Common Issues
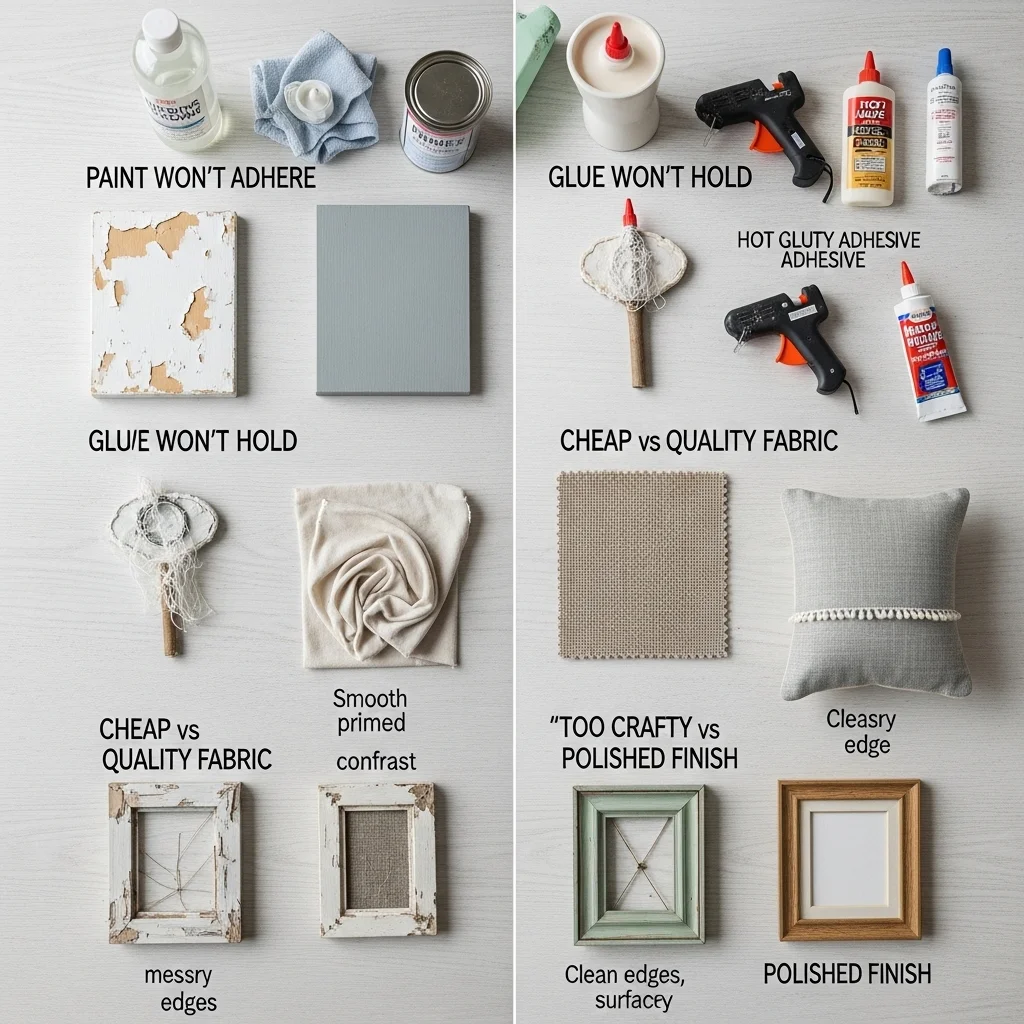
Paint won’t adhere: Surface wasn’t cleaned or needs primer. Clean with rubbing alcohol, let dry, and use appropriate primer.
Glue won’t hold: Wrong adhesive for the material. Hot glue doesn’t work on everything; sometimes you need E6000, wood glue, or construction adhesive.
Fabric looks cheap: It probably is. Upgrade to better fabric, or use techniques like adding trim or mixing with higher-quality materials.
Project looks “crafty” in a bad way: Usually a finish issue. Paint edges cleanly, trim loose threads, add a coat of sealer, or frame it properly.
Nothing looks balanced: Step back, literally. Look at projects from 10 feet away. Small imperfections disappear; composition issues become obvious.
Where This Goes From Here
The handmade decor journey doesn’t really have an endpoint. My skills keep developing, my style evolves, and new techniques constantly emerge.
What started as a money-saving measure has become a genuine hobby that makes my house feel like home. Every room has pieces I made, and each one carries a story the macramé plant hanger I finished during a snowstorm, the abstract painting I created when I was stressed about work, the throw pillows made from my grandmother’s vintage fabric.
These pieces make my space uniquely mine in a way that’s impossible to achieve with only store-bought decor. And when friends visit and ask about them, I get to share not just where I got something, but how I made it.
If you’re thinking about starting, I’d say just pick one simple project and try it. Maybe those painted terra cotta pots, or a simple fabric panel. See how it feels. If you enjoy the process, do another. If you hate it, well, you’re only out an hour and a few dollars.
But I suspect once you hang that first handmade piece on your wall and feel that particular satisfaction of creating something with your own hands, you’ll be planning your next project before the weekend is over.
Because here’s the secret nobody tells you: making things feels good. In a world where we’re constantly consuming, creating something tangible and beautiful is quietly revolutionary. It connects you to a long history of people making their homes beautiful with whatever they had available.
You don’t need to be an artist. You don’t need expensive tools or a big space. You just need to be willing to try, to be okay with imperfection, and to remember that handmade means made by human hands which means it will bear the marks of being human. And that’s exactly what makes it beautiful.